
 Pin it
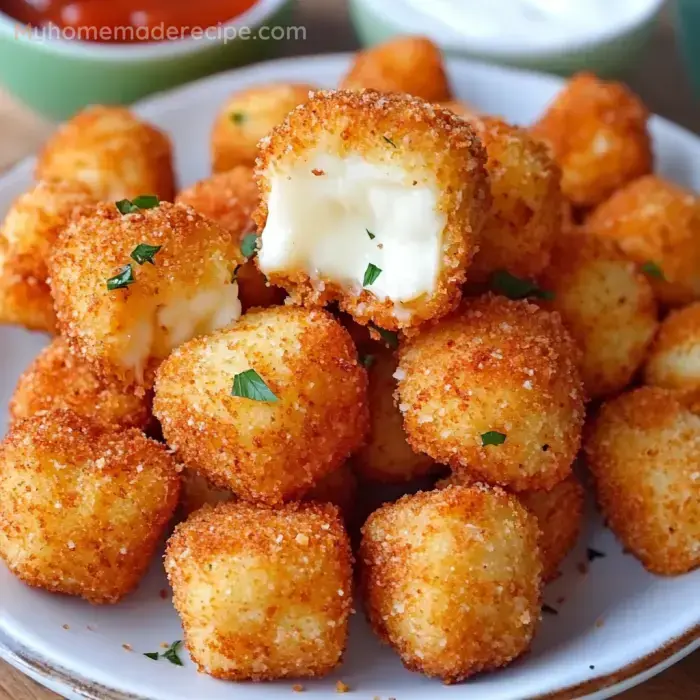
Irresistible Reasons To Try This
You’ll save cash making these at home, and they blow store-bought ones out of the water. They cook up super crunchy outside, all melty and soft inside. Only a handful of pantry basics needed, and it’s a great excuse to use up random cheese. Last weekend, I tossed in some shredded mozz and cheddar and they vanished instantly. Great for late-night snacks or when friends show up hungry.Stuff To Gather
- Oil: Any basic vegetable oil, perfect for frying
- Salt and pepper: Just a little, since cheese brings most of the salty punch
- Seasonings: Paprika, dried oregano, garlic powder—whatever’s handy on your spice shelf
- Breadcrumbs: The crunchy canned ones work perfectly
- Eggs: Just a couple straight from the fridge
- Flour: Regular all-purpose, nothing fancy
- Cheese: Grab a block of mozzarella or cheddar—blocks melt nicer than the bagged stuff
How To Put Them Together
- Drain and munch
- Give the bites a minute on paper towels before you eat—watch out, they’re steamy!
- Time to fry
- Drop them into hot oil in small groups till they’re puffed, crunchy, and float up
- Check your oil
- Pour in about two inches—the oil’s ready when a breadcrumb sizzles fast and doesn’t sink
- Take a break in the fridge
- Chill the coated cheese cubes so they stay together when frying
- Bread the cheese cubes
- Go flour (with a sprinkle of salt and pep), then egg, then seasoned crumbs—use one hand for wet and one for dry so you don’t get doughy paws
- Get your breading bowls ready
- Set out three: one for flour and seasoning, one with whisked eggs, one for the breadcrumbs and spices
- Cube the cheese
- Chop cheese into thumb-sized pieces for best bites
Nailing The Cheese
Skip the pre-shredded bags—block cheese just melts best. Learned it myself after a stringy mess the first try. Sharp varieties pop with flavor, but mixing types makes each bite extra chewy and tasty. Used cheddar and mozzarella last go-around—tasted awesome and pulled apart perfectly.Extra-Crunchy Secrets
Want a thicker crunch? Give every cheese cube a second dip in egg and crumbs after the first coat and a five-minute chill. Picked up the trick from a local spot and it changed the game. Try adding parmesan to the crumb mix too for a cheesy boost. Just press down when breading so the crunch stays on.Fun Dips To Try
We love dipping these in warm leftover marinara. Ranch is perfect too, especially fresh out of the oil. Sometimes I mix mayo and sriracha when I want a kick. Kids will eat them just as is, but a tasty dip makes everyone happy.Keeping Them Fresh
Overdid it last night and stashed leftovers in the fridge—they reheated just fine. Let them cool, then tuck in a sealed box. When you want more, heat ‘em on a baking tray in the oven till hot and crispy again. I make extra on weekends so the kids have easy after-school snacks. If you want to get ahead, freeze right after breading and fry straight from the freezer—works like a charm.Switch Up The Cook Method
Tried these in the air fryer during heat waves—just spritz the basket and cook at 375 till golden. The inside doesn’t get quite as gooey as frying but still gets a solid crunch. Baking works too if you’re patient, though it takes longer. Either way, wait till they’re nicely golden outside—then you know the cheese inside is all melted and perfect.Frequently Asked Questions
- → Can I try different kinds of cheese?
Of course! Cheddar's awesome, but you can use mozzarella, gouda, or even mix a few. Just stick with cheeses that melt well for the best results.
- → Can I bake these instead of frying?
Definitely! Baking works too. Preheat your oven to 400°F (200°C) and bake for 8-10 minutes. They won't be as crispy, but they'll still taste great.
- → How long do leftovers last?
They're tastiest fresh, but if needed, store them in the fridge in an airtight container for up to 2 days. To reheat, pop them in a 350°F (175°C) oven for 5 minutes to bring the crispiness back.
- → How do I stop cheese from leaking during frying?
Good tip—chill the coated bites for at least 30 minutes before frying. The cooler they are, the better they hold up. And keep the oil hot enough—if it's too cool, the cheese might leak before the outer layer cooks.
Conclusion
If crispy cheese bites are your go-to, expand your snack game with similar cheesy classics. Make mozzarella sticks for a timeless treat, or bake cheese crisps for something lighter. Jalapeño poppers bring heat, stuffed mushrooms add elegance, and fried halloumi delivers bold Mediterranean flavors. All are guaranteed cheesy favorites you’ll love!