
 Pin it
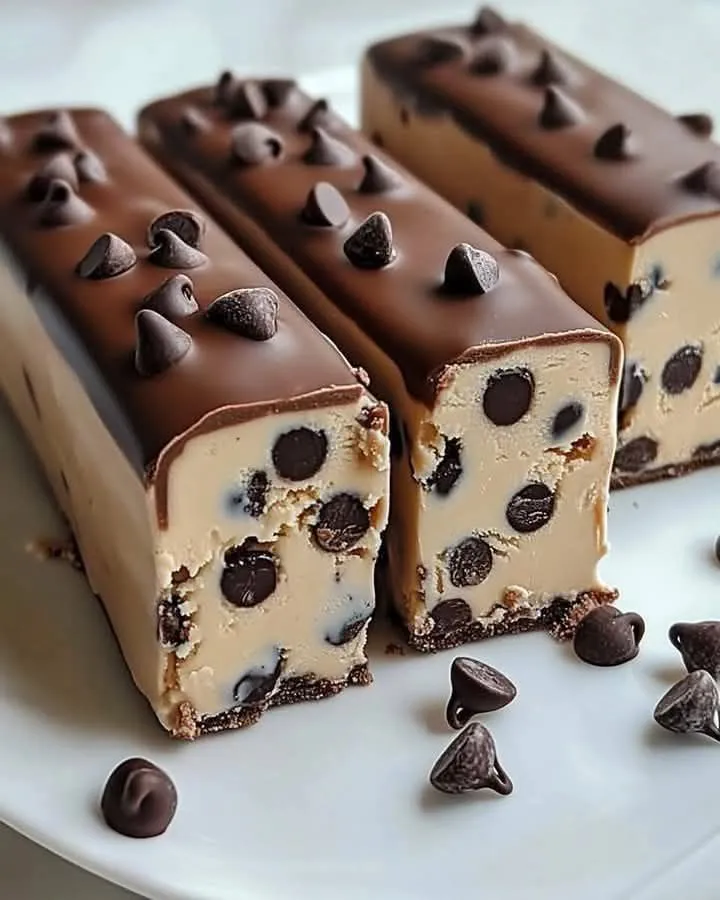
This scrumptious no-bake treat gives you all the yummy cookie dough goodness without any baking needed. Smooth, rich, and packed with chocolate chips, these squares bring all the joy of eating raw cookie dough in a totally safe, easy-to-slice form that's great for parties or late-night cravings.
I whipped these bars up for my kid's pajama party last year, and now everyone always asks for them. There's just something magical about that buttery dough mixed with the crisp chocolate layer on top that makes dessert dreams come true.
Ingredients
- Butter: Creates that lush, velvety foundation for authentic cookie dough taste. Get it soft but not melty for the right consistency.
- Brown sugar: Gives that wonderful caramel-like flavor that makes cookie dough so tempting. Press it down firmly when measuring.
- Granulated sugar: Works with the brown sugar for just the right sweetness. It also helps make the dough feel just right.
- Milk: Adds moisture since we don't use eggs. Full-fat milk works best, though any kind will work fine.
- Vanilla extract: Boosts all other flavors. Try to use real vanilla for the tastiest results.
- All-purpose flour: Builds the base structure. Quickly heat it up first in your microwave or oven for safety reasons.
- Salt: Cuts through sweetness and makes the chocolate pop. Don't skip this tiny but mighty ingredient.
- Chocolate chips: Mixed into the dough for little bursts of chocolate in every mouthful. Both tiny and standard sizes work great.
- Semi-sweet chocolate chips: Used for the top layer to make that wonderful crack when you bite in. Better quality chips melt much nicer.
- Coconut oil: Makes the chocolate topping set up well with a lovely gloss. Get the refined type if you don't want any coconut flavor.
Step-by-Step Instructions
- Fluff up butter and sugars:
- Mix the softened butter with both types of sugar until it turns lighter and gets really fluffy. This usually needs about 3 minutes with an electric mixer. This part puts air into your dough and helps the sugar crystals melt down for better texture.
- Mix in wet stuff:
- Add your milk and vanilla and stir well until they're completely mixed in. It might look a bit weird at first but will come together. Make sure to scrape the bowl so everything gets evenly combined.
- Add the dry stuff:
- Put in flour and salt bit by bit, about half a cup at a time, mixing slowly until just combined. Don't mix too much or you'll end up with tough dough. When done, it should pull away from the bowl and feel like regular cookie dough.
- Add in chocolate chips:
- Put in your chocolate chips and gently mix them with a spatula until they're spread throughout the dough. This careful mixing keeps the chips whole and looking nice in your finished bars.
- Put in your pan:
- Line an 8x8 or 9x9 inch dish with parchment paper, leaving some hanging over the edges for easy lifting later. Push the dough firmly into the pan, making it nice and even. A measuring cup bottom works great for getting a flat surface.
- Cool the dough:
- Put the pan in your fridge for a full hour until it feels firm when touched. This cooling time helps the bars keep their shape when cut and gets the texture just right.
- Make the chocolate layer:
- Melt your chocolate chips with coconut oil in the microwave in 30-second bursts, stirring well between each time. Keep going until it's totally smooth, which takes around 1.5-2 minutes total. The oil makes the chocolate look shiny and helps it cut cleanly without breaking.
- Top the bars:
- Pour your melted chocolate over the cold dough and quickly spread it into an even layer. If you want, sprinkle more chips on top while the chocolate is still wet. Put it back in the fridge for 30 minutes until the chocolate gets completely firm.
- Slice and enjoy:
- After fully chilled, pull the whole thing out using the parchment paper edges. Use a knife warmed under hot water and dried between cuts for nice clean slices. Let the bars sit out for 5-10 minutes before eating so they get the perfect texture.
Brown sugar is truly the hidden star here. I tried making these once with just white sugar and wow, what a difference. The molasses in brown sugar makes that special cookie dough taste that takes me straight back to being a kid stealing dough from my mom's bowl when she wasn't looking.
Storage Solutions
You'll need to keep these cookie dough squares in the fridge because they contain dairy. Store them in a sealed container with parchment between layers so they don't stick together. They'll stay fresh and tasty for up to 5 days in the refrigerator. Want to keep them longer? Wrap single bars tightly in plastic, then stick them in a freezer bag. They freeze really well for up to 3 months. Just let them thaw in your fridge overnight before you plan to eat them.
Creative Variations
This basic recipe works great as a starting point for getting creative. Try using white chocolate, butterscotch, or peanut butter chips instead of regular chocolate. Toss in 1/4 cup of colorful sprinkles for a fun birthday version kids can't resist. Mix in 1/2 cup of chopped nuts, toffee pieces, or smashed Oreos for extra crunch. Want something fancier? Add 1 teaspoon of coffee powder to the chocolate topping or 1/2 teaspoon of almond flavoring to your dough.
Serving Suggestions
These squares look fantastic on dessert trays. For a fancy touch, cut them into tiny bites and put them in mini cupcake papers. They taste amazing with a scoop of vanilla ice cream and hot fudge sauce for a super rich dessert. At parties, set up a toppings station with options like caramel, crushed candy, and whipped cream. They also make wonderful gifts when packed in a pretty tin with parchment paper between the layers.
Frequently Asked Questions
- → Can I change the chocolate chips?
You sure can! White chocolate, nuts, or butterscotch chips all work well here.
- → What's the best way to store them?
Pop the bars into a sealed container, then refrigerate for a week of freshness.
- → Can I make it vegan?
Yes! Just swap the butter and chocolate chips for plant-based alternatives.
- → What if I don't have coconut oil?
Go for butter or a mild vegetable oil instead. They'll do just fine.
- → Can I freeze extras?
Yep! Wrap each bar in plastic, then freeze inside an airtight container for up to three months.