
 Pin it
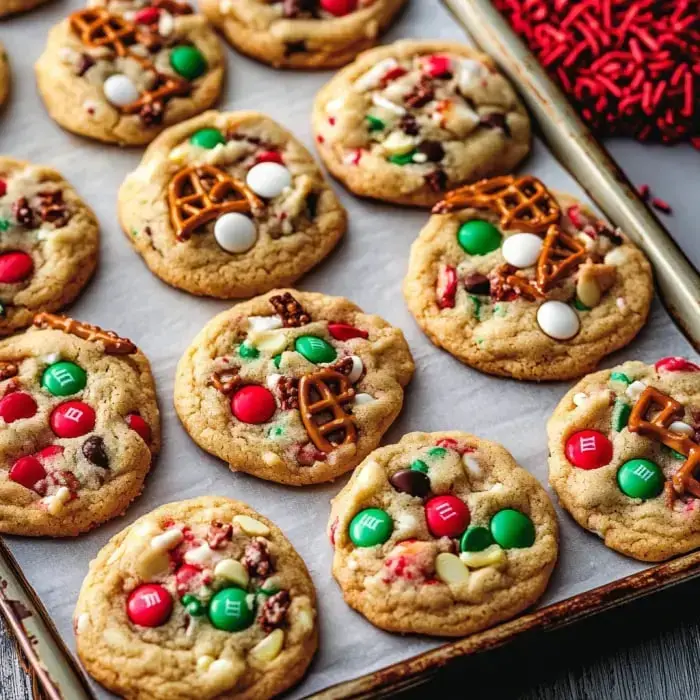
Last December, my kids and I decided to just dump all our snacks into some cookie dough, and wow—out popped these wild Christmas Kitchen Sink Cookies. Every nibble’s crunchy, chocolaty, sweet, and salty with loads of pretzel bits, potato chips, and colorful candy. Folks keep begging for them all month long. They're stuffed with everything we crave in a holiday treat.
Magical Cookie Moments
I love these cookies because everyone goes nuts for them. They're loaded with flavors and all sorts of textures, making each bite a surprise. You don’t need to chill the dough, so you can whip them up with your kids in an afternoon or crank out a batch for a holiday party last minute.
All You Need
- 1 cup each smashed pretzels and chips: The more salty crunch, the better.
- 1 cup white chocolate chips: Brings a creamy burst of sweetness.
- 1 cup holiday M&Ms: Use the cheery reds and greens for that festive feel.
- 2 teaspoons vanilla: I always pick the real deal for flavor.
- 2 cups mixed sugars: Half white, half brown for chewy, soft cookies.
- 1 cup salted butter: Let it chill on your counter so it’s soft but not runny.
- 2 egg yolks: These make the texture super rich.
- 2 1/4 cups flour: Just plain old all-purpose works fine.
- 1 teaspoon each baking soda and powder: These two together give you the perfect lift.
- 1/2 cup Christmas sprinkles: Pick the ones that don’t melt out into the dough.
Easy Steps
- Bake 'Em Up
- Shape your dough into about twenty balls and plop them onto lined baking pans—then let the oven work its magic.
- Pack In the Good Stuff
- Here’s the fun part: Stir in all your candies, chips, and crunchy extras till you see them everywhere.
- Add Your Dry Mix
- Carefully work in flour, baking soda, powder, and a bit of salt, just until blended.
- Mix Wet Ingredients
- Add vanilla and egg yolks to your mix, and keep beating till everything’s super glossy and smooth.
- Cream That Butter and Sugar
- Beat together the sugars and butter till it’s really pale and fluffy—it takes around two minutes.
Change Things Up
Sometimes I like switching in butterscotch chips or tossing in nuts. Want them to look amazing? Press a few extra pretzels or M&Ms on top right before baking. Some of my family begs for dark chocolate chips instead of white.
Stays Fresh Longer
Stash finished cookies in an airtight tin—they won’t lose their touch for five days. Dough lasts three days in the fridge, or freeze it and you’ve got treats for two weeks. Just set out from the fridge or freezer until it’s at room temp, then bake away.
Stuff I Always Do
Measure your flour with care. Too much? You get tough cookies. I like shaping warm cookies with a round cutter right after baking for that bakery look. Whipping the butter and sugars extra well is the secret to the best texture.
 Pin it
Frequently Asked Questions
- → What’s the right way to measure flour?
Too much flour can make cookies dry. Spoon it into your measuring cup and scrape off the top, or weigh it for accuracy.
- → Why do eggs need to be at room temperature?
They mix more smoothly with butter and sugar, leading to a dough that’s evenly blended and cookies with a better texture.
- → How do I prevent mix-ins from breaking apart?
Use a spatula to gently fold them in by hand instead of using a mixer. This keeps pretzels and chips intact.
- → Why use a cookie cutter after baking?
Shaping them while they’re fresh from the oven helps you get neat, round cookies before they fully harden.
- → Can I swap out mix-ins?
Of course! Just keep the same amounts but feel free to experiment with your favorite candies and snacks.