
 Pin it
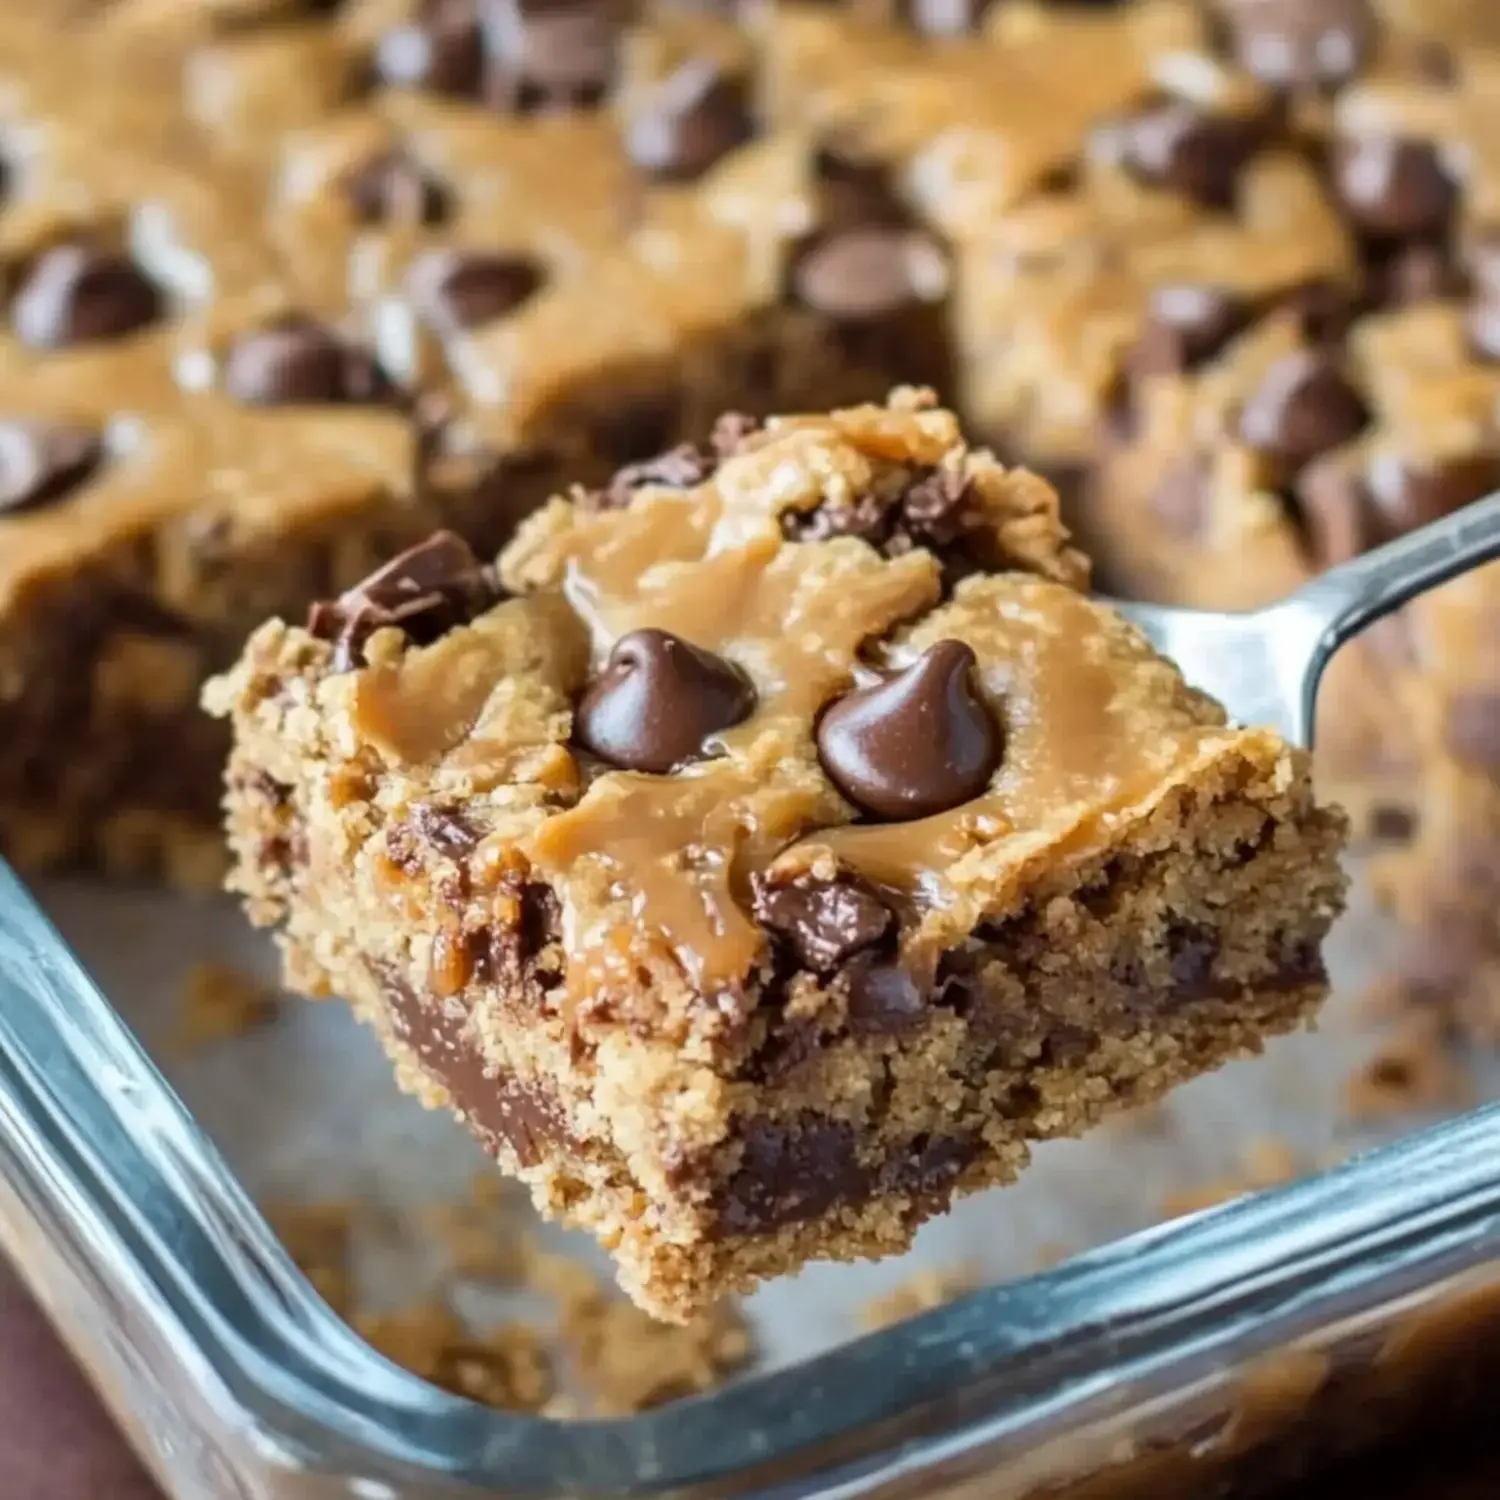
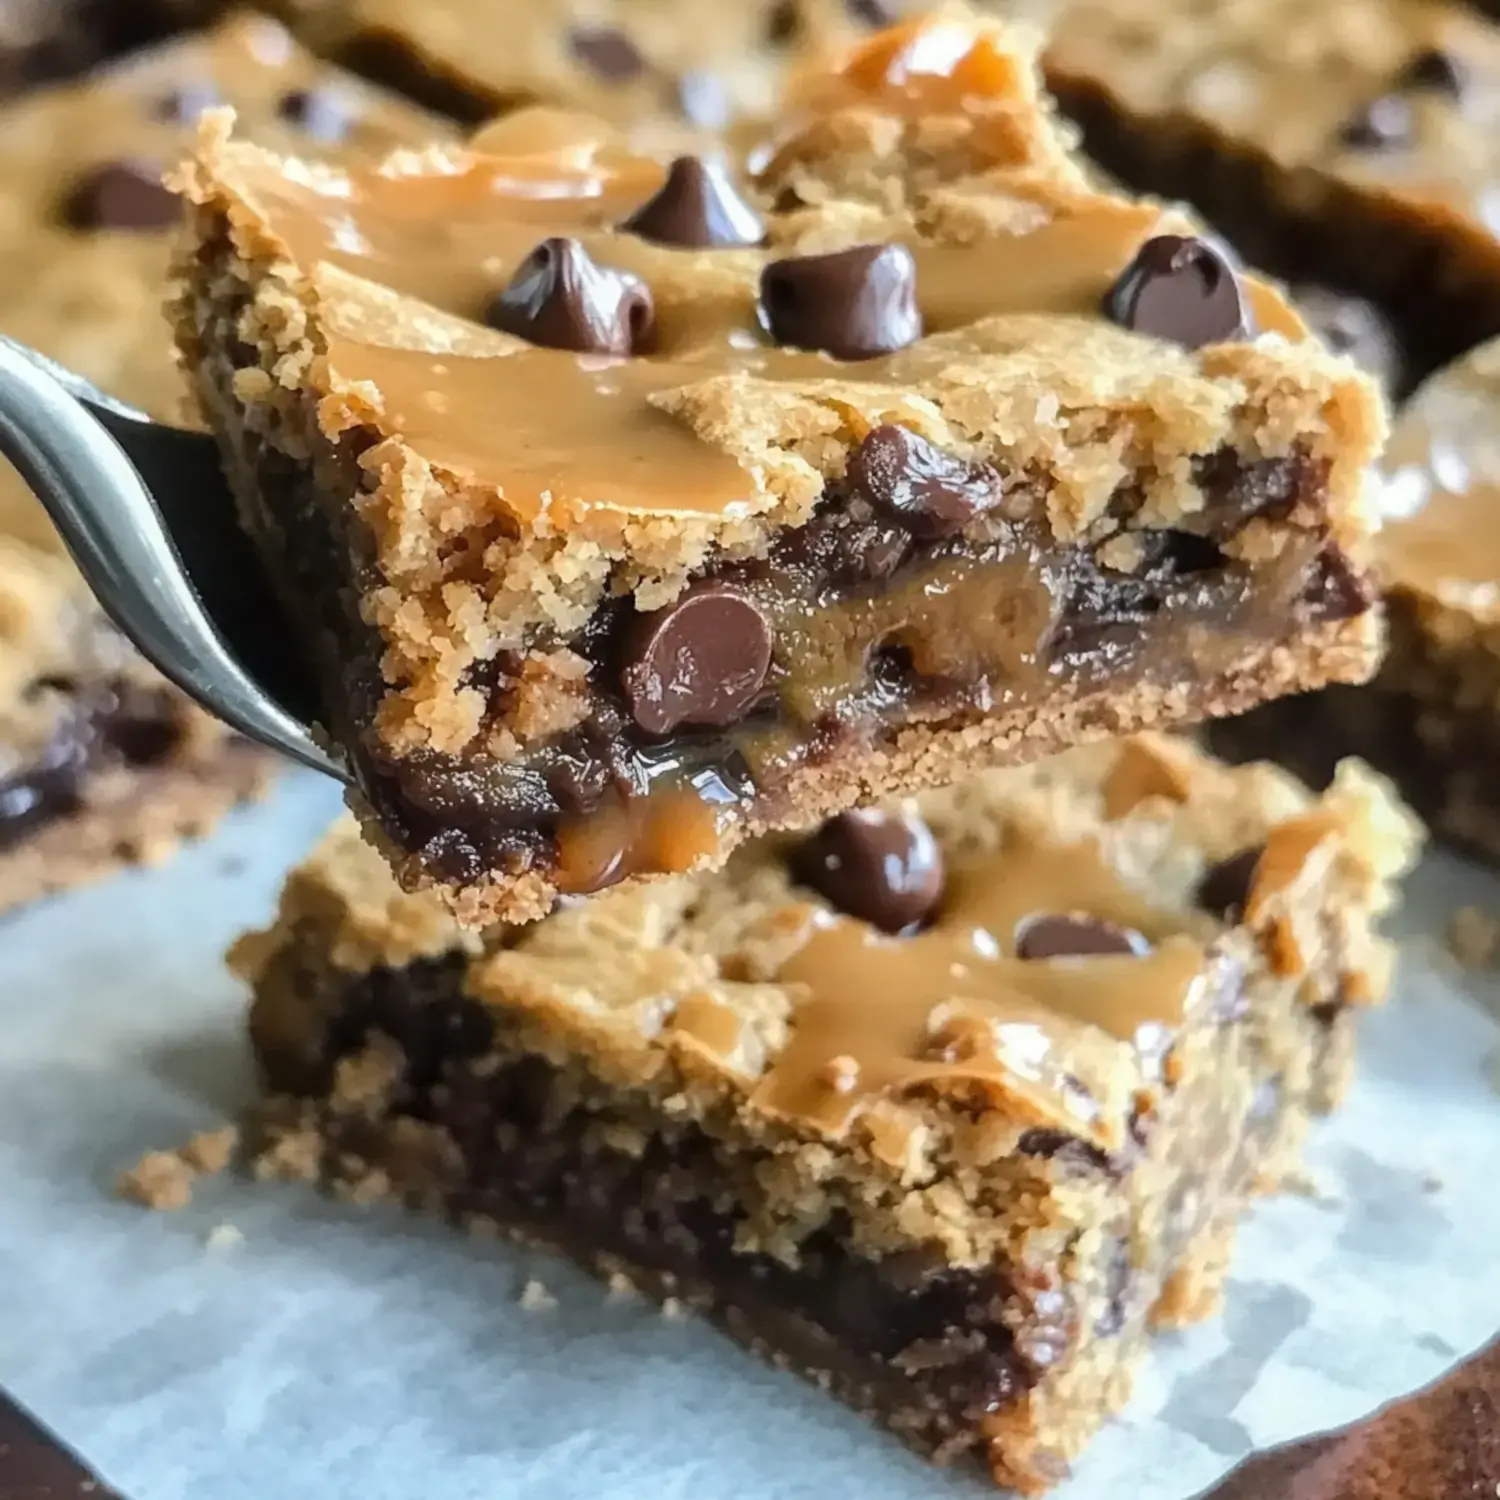
My Out-of-This-World Bars combine ooey-gooey caramel, nutty peanut butter, and rich chocolate into something you can't put down. Trust me, these treats live up to their name - one bite and you'll be floored by how good they are. I'm always torn between hoarding them all or being nice enough to let others have a taste.
Why These Treats Stand Out
What I adore about these bars is their perfect balance of flavors - they're sweet yet salty, sticky but chewy. The caramel just sinks right into the cookie foundation while those chocolate chips create spots of pure indulgence. I make them for get-togethers but they usually disappear from my counter first. At least they can be frozen when I manage to hide some away.
What You'll Need For Success
- Flour: The backbone for our chewy, tender base.
- Baking Soda: Gives that subtle rise we want.
- Salt: The secret that makes everything pop.
- Butter: Adds that can't-beat richness.
- Sugar: Creates a beautiful golden crust.
- Brown Sugar: Brings those deep, molasses notes.
- Vanilla Extract: Adds soul to each delicious layer.
- Eggs: The glue that binds our creation.
- Semi-Sweet Chocolate Chips: Pockets of melty goodness throughout.
- Evaporated Milk: The key to silky-smooth caramel.
- Caramels: The heart of our irresistible middle.
- Peanut Butter: That subtle, earthy flavor we crave.
Step-By-Step Baking Guide
- Get Your Baking Dish Ready
- Heat your oven to 350°F and don't skimp on greasing that 9x13 pan.
- Combine Dry Stuff
- Mix your flour, baking soda and salt in a bowl and put it aside.
- Whip Up Your Dough
- Cream butter with both sugars until light, mix in eggs and vanilla, then fold in your dry mix and chocolate chips.
- Start The Layering
- Press half the dough into your pan and bake just until it's barely set, about 8-10 minutes.
- Create Your Gooey Center
- Mix caramels with evaporated milk until smooth, then stir in peanut butter until velvety and pour over your first layer.
- Finish With Remaining Dough
- Dollop the rest of your dough all over that amazing caramel layer and gently spread it out.
- Final Bake
- Pop it back in for 15-20 minutes until it turns golden, then comes the toughest part - waiting for them to cool down.
Where This Treat Came From
Whenever I bring these bars anywhere, folks always ask about their unusual name. After one taste, they get it completely. Something magical happens when cookie dough, caramel and chocolate come together. These are my fail-safe when I need to wow a crowd.
Tasty Variations
You can leave out the peanut butter if you're dealing with nut allergies or swap in some white chocolate chips for something different. Just remember to use evaporated milk instead of condensed - these treats are plenty sweet on their own.
Storage Tips
Don't rush cutting these bars - they really need to cool fully. They'll keep nicely in a container for up to 3 days at room temperature. You can also stash them in the freezer for 3 months and they'll thaw beautifully when you want them.
Take Them Up A Notch
Try them alongside a scoop of vanilla ice cream or with some tart berries for contrast. They're amazing with coffee or a cold glass of milk. When I'm feeling fancy, I'll add an extra drizzle of warm caramel right before serving - it's absolutely heavenly.
 Pin it
Frequently Asked Questions
- → What type of caramel is best?
- Go for soft, wrapped caramel candies from the candy section—they melt perfectly. Skip caramel sauce as it won’t set quite right.
- → Why melt caramel using a double boiler?
- A double boiler gently heats the mix without scorching it, giving you silky smooth results.
- → Can I prep these in advance?
- Yep, these store well in an airtight container. Just use parchment between layers to stop sticking.
- → What’s the reason for baking the bottom first?
- Baking the base layer provides a stable foundation to hold the thick caramel filling.
- → When are they ready?
- Look for a golden color on top with firm edges. The middle can stay slightly soft—it sets as it cools.