
 Pin it
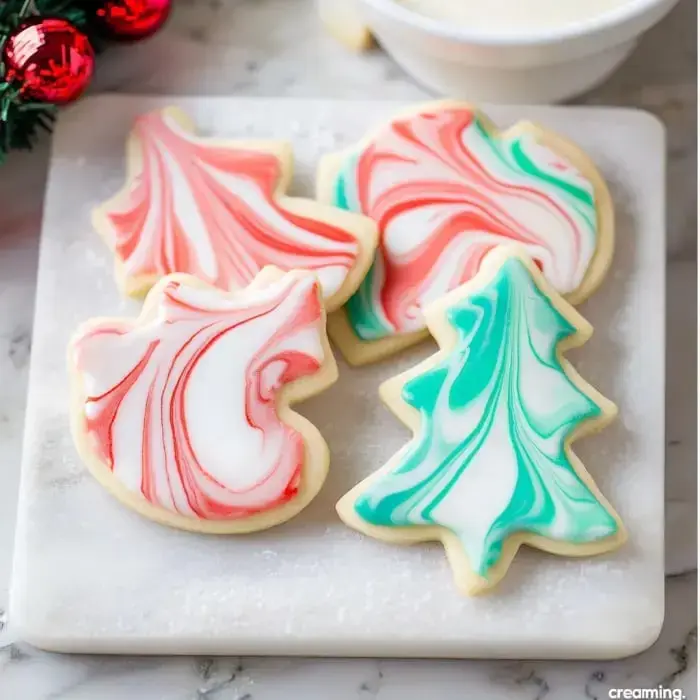
Gotta spill the beans about my go-to holiday treat. These Swirled Holiday Sugar Cookies have become what everyone expects from me each December. What makes them special? My powdered sugar mixture that gives them an amazingly tender bite. Once you add those twirled royal icing patterns, they look fancy enough for a bakery window. My crew fights over them during the holidays, and I bet yours will too.
What Makes These Treats So Special
I'm crazy about how these cookies take the basic sugar cookie up several notches with those gorgeous swirls. My little ones help swirl the colors and no two ever match. That soft, buttery base paired with the sweet royal topping gives you that melt-in-your-mouth goodness we all want during the holidays. When I bring them to parties, they're always gone in minutes.
Your Shopping List
- Butter: Softened salted butter or plain butter plus a pinch of salt.
- Powdered Sugar: This creates a more tender bite than regular sugar.
- Egg: Let it sit out till it reaches room temp.
- Vanilla Extract: Brings that familiar taste; bourbon vanilla works wonders too.
- Flour: Regular all-purpose or go fancy with organic unbleached.
- Baking Powder & Salt: These work together for the right rise and taste.
- Royal Icing: Mix up powdered sugar, meringue powder, water, and food coloring gels for those pretty swirls.
Step-By-Step Instructions
- Start With The Wet Stuff
- Beat your butter and powdered sugar until light and airy. Throw in egg and vanilla, mixing thoroughly.
- Add The Dry Elements
- Stir flour, baking powder, and salt together. Slowly blend into your wet mixture.
- Cool It Down
- Shape your dough into flat circles, wrap them up, and stick them in the fridge for half an hour.
- Shape Your Cookies
- Flatten the cold dough to ¼ inch, cut shapes, and lay them on cookie sheets with parchment.
- Into The Oven
- Cook at 350°F (175°C) for about 9–15 minutes till the edges turn slightly golden.
Mastering Those Gorgeous Swirls
Making those swirls is a blast and super simple too. Get your royal icing nice and smooth, then split it between different bowls. Drop in your gel colors and just barely mix them. Don't stir too much or you'll mess up those pretty patterns. Take each cooled cookie and dunk the top into your icing, letting extra drip off. Every cookie comes out with its own unique swirled design.
Twist The Recipe Your Way
I always try different color mixes for these cookies. Red and green work great at Christmas, but I've done red and pink for Valentine's and light blues and yellows for spring. Sometimes I'll add a drop of almond flavor or maybe some caramel to shake things up. Tossing some sparkly sugar or tiny metallic balls on top while they're still wet makes them extra festive.
Storing Your Batch
Your cookies will stay yummy in a sealed container on the counter for around 4 days. Tuck them in the fridge and they'll last a whole week, though the icing might get a bit tacky. I usually make double batches of dough and freeze some for unexpected visitors. Just don't forget to put wax paper between layers so they don't stick.
No Gluten Version
My sis can't eat gluten so I've figured out a way to make these for her too. You'll want to grab a really good gluten free flour mix. I sometimes throw in some almond flour for extra flavor. Just make sure all your stuff is certified gluten free and follow along with the regular steps. They turn out just as tasty.
Wrapping Them Up
These cookies make the best holiday presents. I like to stack them in cute Christmas containers with parchment between layers. People always smile when they see those beautiful marbled tops. They're perfect for giving to teachers, bringing to cookie swaps, or just dropping off at a neighbor's house during the season.
 Pin it
Frequently Asked Questions
- → Why is powdered sugar better here?
- It makes the cookies tender and helps them stay in shape while baking. At high altitudes, use less powdered sugar.
- → What should royal icing look like?
- It should flow smoothly and settle in 5-8 seconds. Add water or sugar to adjust until it’s perfect for spreading.
- → How long do these cookies last?
- If stored in a sealed container with wax paper in between, they’re good for up to a week once the icing hardens.
- → Why refrigerate the dough?
- Chilling for 30 minutes firms it up so cutting shapes is easier, and cookies don’t spread as much while baking.
- → Is this recipe okay for high altitude?
- Yes! Add 2 tablespoons of flour, reduce the sugar slightly, and add water if it seems dry. Follow usual high-altitude tips.