
 Pin it
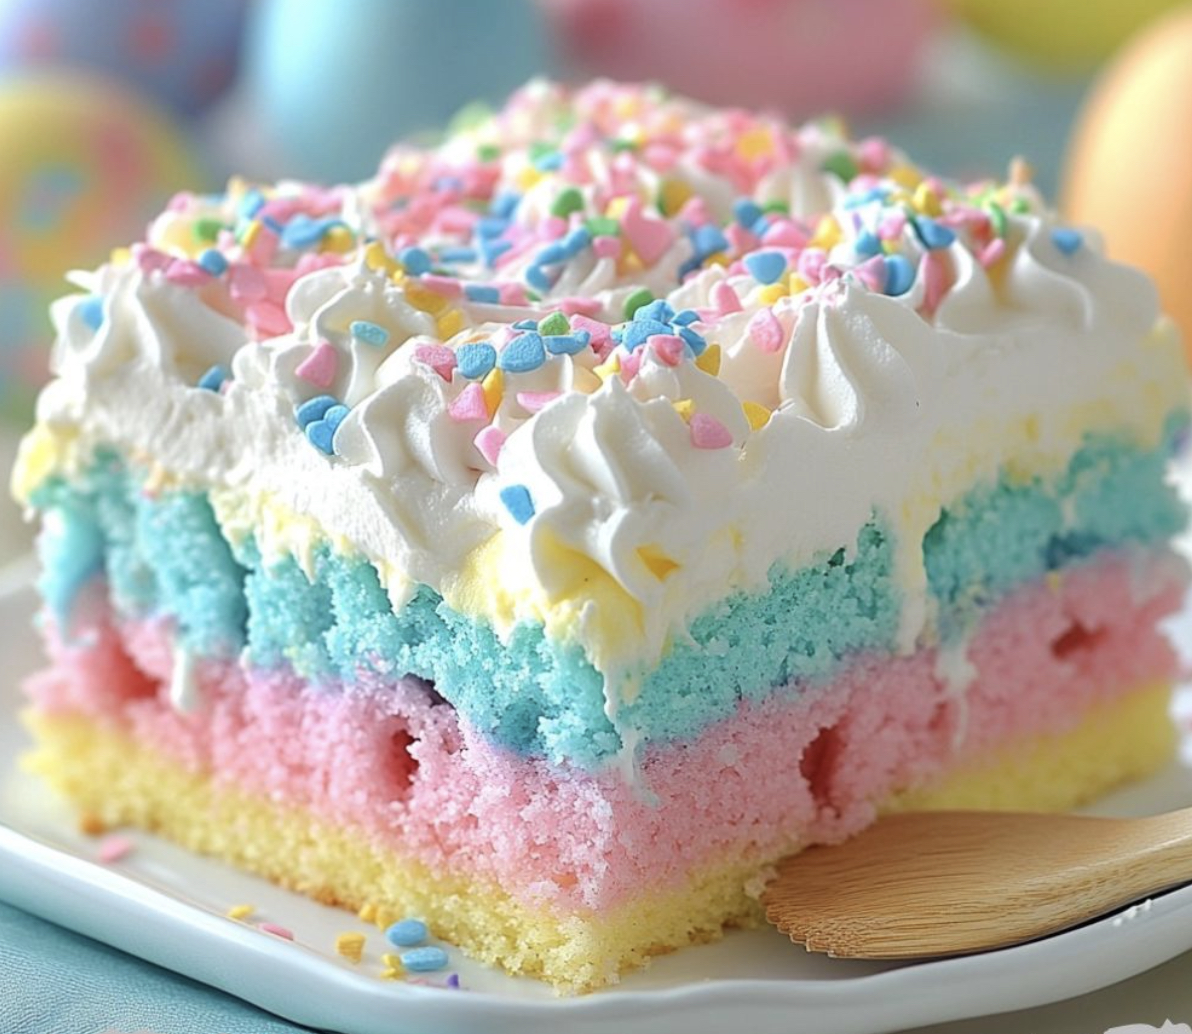
This fun Easter Bunny Poke Cake turns a simple boxed mix into a fancy spring dessert that both kids and grown-ups will love. When you cut a slice, you'll see pretty pastel rainbow colors inside with pockets of pudding that make it super moist and yummy—just right for your Easter party.
I whipped this cake up for the first time when my nieces came over for our yearly Easter egg hunt. They couldn't stop smiling when I cut into it and showed all those colors, and now they beg me to bring it to every spring family get-together.
Key Ingredients
- White cake mix plus box ingredients: Makes the perfect plain background to show off your pretty colors and always works out great
- Instant vanilla pudding mix: Makes those yummy soft spots that define a proper poke cake
- Milk: Full-fat gives the creamiest pudding but any kind will do
- Whipped topping: Added to pudding and used for frosting to give that fluffy cloud-like feel
- Vanilla extract: Just a touch boosts the flavor that boxed mixes sometimes don't have
- Food coloring in pink, blue, and yellow: Soft colors give that Easter springtime look
- White chocolate chips: Melted and spread on top adds a sweet layer and keeps the cake from getting too wet
- Pastel sprinkles: The last touch that really makes it look like a celebration cake
How To Make It
- Mix up your batter:
- Stir your cake mix following the box directions until it's totally smooth. Take your time with this part since good mixing means your cake will have the same texture all through. Don't forget to heat your oven to 350°F and grease your pan really well.
- Make your pastel colors:
- Split your batter evenly into three bowls using a measuring cup to be exact. Put a few drops of food coloring in each bowl, starting with less than you think. Mix well and add more until you get soft pastel shades. Remember they'll get a bit lighter after baking.
- Put the colors in the pan:
- Pour the first color into your greased pan and spread it out to the edges. Carefully add the second color so it sits partly on top. Then add the third color to create a pretty swirled look. Don't mix them too much—you want to see separate colors.
- Bake it right:
- Stick it in the hot oven for 30 minutes, then check by poking a toothpick in it. You want the toothpick to come out clean or with just a few crumbs. Let it cool all the way, about 1-2 hours, or pop it in the fridge for 30 minutes if you're in a hurry.
- Poke your holes:
- Use a wooden spoon handle to make holes about an inch apart all over the cake. Push down almost to the bottom of the pan but not through it. The holes should be easy to see but not so big they wreck the cake.
- Make your filling:
- Beat the pudding mix and milk hard for 2 minutes until it starts getting thick but can still be poured. Mix in 1 cup of whipped topping and vanilla for extra smoothness and taste. It should be nice and silky.
- Fill all the holes:
- Pour the pudding mix over the whole cake, focusing on getting it into the holes. Use a spatula to help push it in. Tap the pan on the counter a few times to help the pudding sink down into the holes.
- Add white chocolate:
- Melt white chocolate chips in the microwave, stopping every 30 seconds to stir until smooth. Pour it over the cake while it's still a bit warm and spread it out evenly. This makes a tasty layer that stops the cake from getting soggy.
- Top it off:
- Once the chocolate gets firm, spread a thick layer of whipped topping all over, making some nice swirls if you want. Right away add your sprinkles before the topping sets so they stick well. Pastel colors work best for an Easter theme.
- Let it set and enjoy:
- Put the cake in the fridge for at least 2 hours before serving so everything can set and the flavors can mix together. For the best taste, leave it overnight. Cut into squares to show off the pretty pastel inside.
I've got to say the vanilla pudding is actually my favorite part of this cake. I figured this out after making so-so poke cakes for years. Adding whipped topping to the pudding turns it into something like mousse that makes this more than just an ordinary cake—it's what everyone always asks me about!
Do-Ahead Dessert
You can't beat this Easter Bunny Poke Cake for planning ahead. Make it up to two days before your party and it'll actually taste better sitting in the fridge. The pudding keeps working its magic on the cake, making it softer while still holding together well. If you're making it way ahead of time, wait to put the sprinkles on until a few hours before serving so they stay bright and pretty.
Fun Changes To Try
Once you know the basics of this Easter cake, you can switch things up however you want. Maybe try lemon pudding with a yellow cake for something tangy and fresh. If you love chocolate, go for a chocolate cake with chocolate pudding for a super rich treat. During other times of year, swap out the pastels for different holiday colors like red and green at Christmas or orange and black for Halloween. The method stays the same but you can match any celebration.
Ways To Serve It
For a wow-worthy Easter dessert table, put this cake next to some fresh berries and mint leaves for natural color pops. Add a small dollop of fresh whipped cream on each plate to make it extra fancy. Want to go all out? Serve slices with pastel ice cream that matches the cake colors. This dessert goes great with coffee or tea for the adults and milk for the kids, so it works for any Easter get-together from morning brunch to dinner.
Where Poke Cakes Come From
Poke cakes got popular back in the 70s when Jell-O started sharing recipes that used their products in everyday baking. The idea of poking holes and filling them with tasty liquids changed home baking by making it easy to create moist, delicious cakes without much work. People still love poke cakes today because you can make them so many ways, they look amazing when sliced, and everybody enjoys them. This Easter version keeps the tradition going while adding modern touches like the white chocolate barrier and fun spring colors.
Frequently Asked Questions
- → Can I swap the pudding flavor?
Of course! Try coconut, lemon, or even chocolate pudding for a creative switch-up.
- → What can I do to stop the cake from sticking?
Butter or spray the pan well, and for added security, lay parchment paper on the bottom.
- → How much time should the cake chill?
Let it chill a minimum of 2 hours, but overnight chilling works even better for flavor and texture.
- → Can this dessert be made ahead?
Yes! Assemble and refrigerate it up to a day early. Save the whipped topping and sprinkles for just before serving.
- → Why do I poke holes in the cake?
The holes let the pudding soak into the cake, making it ultra moist and full of flavor.