
 Pin it
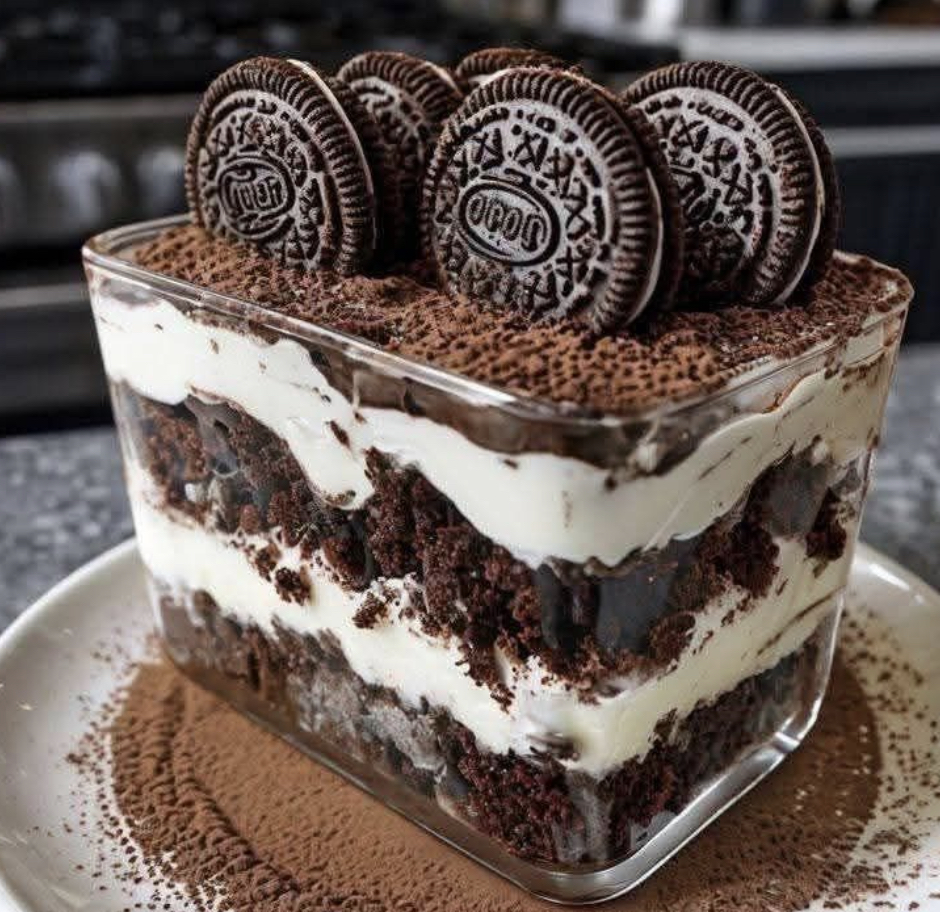
This Oreo Tiramisu Trifle turns the traditional Italian favorite into an eye-catching chocolate fantasy. Layers of moist chocolate cake, smooth pudding, crunchy Oreos and fluffy stabilized whipped cream come together in perfect harmony. You'll love the play between the soft coffee-soaked cake and the bold crunch of crushed cookies—it's a dessert that feels fancy yet comforting all at once.
When I brought this to my sister's birthday last week, it vanished quicker than anything else on the table. Even my tiramisu-hating nephew couldn't stop himself from grabbing seconds!
Key Components (and their purpose):
- Chocolate Sheet Cake: Serves as the main base, giving you that coffee-soaked goodness that makes tiramisu special
- Instant Espresso Powder: Packs real tiramisu flavor without needing to brew actual coffee
- Sour Cream: Works behind the scenes to keep your cake incredibly soft
- Chocolate Pudding: Adds that velvety middle section between cake and cream
- Full-Fat Cream Cheese: Makes your whipped cream last for days without deflating
- Cold Heavy Cream: Needs to be ice-cold to whip up into those fluffy clouds
- Oreo Cookies (crushed and whole): Brings the crunch factor and boosts chocolate flavor throughout
- Baking Powder AND Baking Soda: Team up for the ideal lift and softness in your chocolate cake
Making Your Trifle:
- 1. Crafting Your Chocolate Base
- Get your oven warming to 325°F instead of the usual 350°F—this lower temp helps everything bake evenly without dry edges. Put parchment in your 9x13-inch pan with extra hanging over the sides for easy grabbing later. Here's a cool trick: place two flower nails flat-side down in the middle of the pan, a few inches apart, after spraying everything with cooking spray. These metal nails help cook the center, so you won't get that annoying dome. Mix all your dry stuff in a big bowl, making sure to break up any cocoa clumps. In another bowl, mix the instant espresso with hot water to wake up the coffee flavor. Add the rest of your wet ingredients to this coffee mix, making sure your eggs and dairy aren't cold from the fridge. Combine wet and dry in two batches, but don't mix too much or your cake will get tough. Pour the batter in, put those flower nails back in place, and tap the pan on the counter to pop air bubbles. Bake for 32-37 minutes, turning halfway. It's done when a toothpick comes out with just a few wet crumbs stuck to it.
- 2. Whipping Up Your Pudding Layer
- While the cake's in the oven, let's tackle the pudding. The instant kind works perfectly here and saves tons of time. Dump both packages into a big bowl with plenty of mixing room. Pour in cold milk all at once and start whisking hard for a full 2 minutes—don't skimp on this part, it's what makes the pudding thicken right. It'll still look pretty runny now, but don't worry. Put plastic wrap directly touching the pudding surface so it won't form that weird skin. Chill for at least 30 minutes until it's set but still easy to spoon out.
- 3. Creating Perfect Oreo Cream
- For the star of the show, timing matters most. Make this just before you put everything together for maximum fluffiness. Start with cold cream cheese—not room temp like you might think—and beat until it's totally smooth with no lumps. Add powdered sugar bit by bit on low speed so you don't end up wearing it. Once it's mixed in, crank up to medium-high and beat until it looks light and fluffy. Add vanilla, then slowly pour heavy cream down the side of the bowl in several additions. This gradual approach stops splashing and keeps your volume. When it starts getting thicker, toss in the crushed Oreos and keep beating just until stiff peaks form—that's when you lift the beater and the cream stands up with a tiny curl at the tip. Watch carefully because if you go too far, you'll end up with butter! Keep it cold until needed, but try to use within 30 minutes for best results.
- 4. Putting It All Together
- Make sure your cake is totally cool, then cut it into 1-inch squares. Getting them roughly the same size helps with both looks and how the flavors soak in. Place half your cake cubes in the bottom of a clear trifle dish, pushing some against the glass so they show. Spoon half the pudding over the cake, using the back of a spoon to spread it all the way to the edges for that pretty layered look. Make a layer using 1 cup of Oreos—whole ones give more crunch, crushed ones make it easier to serve. Add half your Oreo whipped cream, using an offset spatula at a slight angle to get a smooth layer that touches the glass all around. Do these layers again, being careful not to mess up what you've already done. For the top, place whole Oreos around the edge with equal spacing, then pipe any leftover cream in pretty swirls between them. Finish with a light sprinkle of crushed Oreos or cocoa powder to make it look fancy.
I've made this trifle many times over the years, but adding espresso powder took it from good to amazing. My husband usually stays away from sweet treats, but he always grabs a serving of this one, saying the coffee notes cut through the sweetness just right.
Plan-Ahead Perks
This Oreo Tiramisu Trifle is a lifesaver for busy hosts. You can bake the chocolate cake up to three days before your event and keep it in an airtight container on your counter. I've found that if you wrap it in plastic while it's still a bit warm, it stays extra moist. The pudding can be made a day ahead and kept covered in your fridge. Actually, the fully assembled trifle gets better after chilling at least 4 hours, as the flavors mix together and the cake softens from the layers around it. The whole thing stays beautiful for two days in the fridge, though the Oreos will get softer—which many of my guests actually prefer!
Fixing Common Problems
Even if you bake all the time, layered desserts can be tricky. If your whipped cream won't get thick, your tools or ingredients were probably too warm—stick your mixing bowl and beaters in the freezer for 15 minutes before starting again. Got lumpy pudding? Push it through a fine strainer before adding it to your layers. Finding everything too sweet? Use dark chocolate cocoa in the cake and cut the powdered sugar in the cream by up to a third. When it's time to serve, dip your knife in hot water and wipe it clean between slices to show off all those gorgeous layers you worked so hard to create.
Switch Things Up
Feel free to play around with this flexible trifle based on what's in season or what you're craving. Try adding fresh raspberries or strawberries between the cake and pudding in summer—their tartness balances the richness perfectly. During the holidays, swap in Mint Oreos and add a splash of peppermint extract to the whipped cream. For grown-up gatherings, I sometimes brush the cake pieces with coffee liqueur before layering. Chocolate lovers can swap vanilla extract for chocolate extract and top with chocolate shavings made by running a vegetable peeler down the side of a chocolate bar. Whatever changes you make, just keep the balance of cake to creamy stuff the same for that perfect bite every time.
Frequently Asked Questions
- → Can this Oreo dessert be prepped early?
Yes, you can! Make each part of the dessert up to a day in advance and refrigerate them separately. Put it together a few hours before serving so the flavors blend nicely while the textures stay fresh. The cream cheese-stabilized whipped cream remains firm, even overnight.
- → Is store-bought cake a good alternative?
It sure is! While the homemade option adds a delightful homemade touch, you can use a pre-made chocolate cake or brownies to save time. Just cut them into bite-sized cubes as per the instructions.
- → What can replace espresso powder?
Instant coffee granules work as a great substitute. Or, swap the water and espresso powder combo for 3/4 cup of strong brewed coffee that’s been cooled down.
- → What’s the perfect trifle dish size?
A 4-5 quart (3.8-4.7 liter) trifle dish is ideal. Don’t have one? No problem! Use a large glass bowl or make adorable individual versions in mason jars or wine glasses.
- → How can I make it without dairy?
It’s tricky but possible! Use dairy-free chocolate cake, vegan pudding mix with almond or oat milk, and coconut-based whipped cream. Just know the taste and texture can vary slightly from the original.
- → What are flower nails and are they necessary?
These metal tools are usually for cake decorating but here they help the cake bake evenly by conducting heat. If you don’t have them, you can skip this step, just keep an eye on the baking time.