
 Pin it
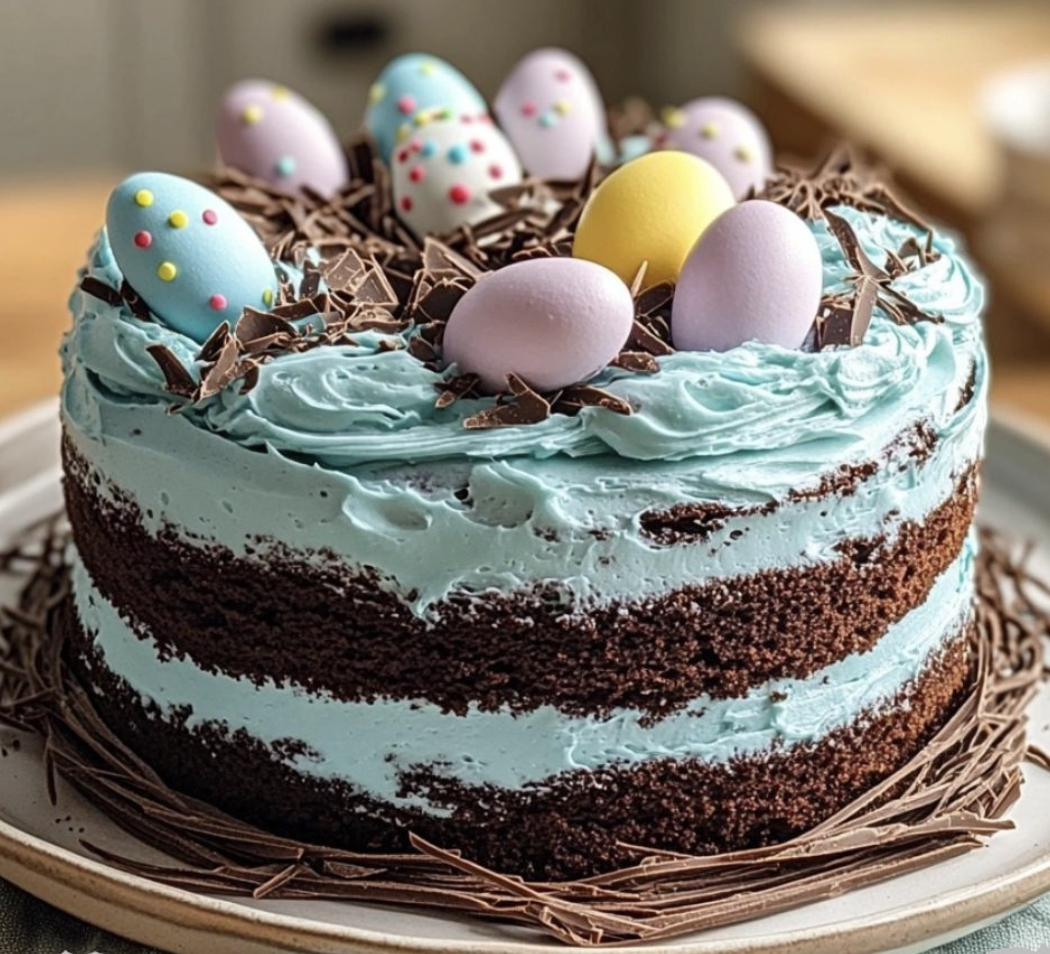
This indulgent robin's egg chocolate cake turns any springtime get-together into a memorable event with its juicy chocolate tiers and vivid blue icing that mirrors the subtle charm of robin eggs tucked in a chocolate nest.
I whipped up this cake for my kid's spring birthday bash last season, and the youngsters couldn't hide their excitement when they spotted the magical blue "eggs" snuggled in chocolate. It's become our family's top-requested treat from springtime through early summer.
Ingredients
- All purpose flour: Builds just the right foundation without feeling heavy or too airy
- Unsweetened cocoa powder: Adds rich chocolate notes without going overboard on sweetness
- Buttermilk: Keeps everything soft and helps the baking soda work its magic
- Hot water: Wakes up the cocoa flavor and creates an amazingly damp texture
- Blue gel food coloring: Works way better than the liquid stuff for nailing that perfect robin's egg shade without making the frosting runny
- Candy coated chocolate eggs: Add the ideal finishing element, try to find speckled ones for a more natural look
Step-by-Step Instructions
- Get Everything Ready:
- Heat your oven to 350°F and fix up two 8 inch round cake pans by coating them well and putting parchment circles on the bottoms. I always give the parchment a quick spray too just to be extra sure nothing sticks.
- Blend Dry Stuff:
- Stir the flour, cocoa, sugar, baking soda, baking powder, and salt together in a big bowl until they're totally mixed and no cocoa clumps are left. Running these items through a sifter can help you avoid any lumpy surprises.
- Mix Wet Stuff:
- Throw in the eggs, buttermilk, vegetable oil, and vanilla with your dry mix. Beat at medium speed for around 2 minutes till everything looks smooth. Your mix will be kind of thick right now.
- Pour In Hot Water:
- With your mixer running slow, slowly add the hot water bit by bit. This step really matters since it brings out the chocolate taste and thins the batter down. Mix just until everything comes together, about a minute, but don't go overboard.
- Cook It Just Right:
- Split your batter evenly between your pans. A kitchen scale helps make sure your layers match. Bake for 30 to 35 minutes until you can stick a toothpick in and pull it out with just a few damp crumbs. The cakes should bounce back a little when you tap them.
- Whip Up Robin's Egg Frosting:
- Beat the soft butter for a full 3 minutes until it's fluffy and pale. Slowly add powdered sugar, milk, and vanilla, mixing well each time. Drop in tiny bits of blue gel coloring until you nail that perfect robin's egg blue.
- Put It All Together:
- Set your first cake layer on a plate and spread about 1 cup of frosting over it. Add the second layer and cover the whole cake with your remaining buttercream, aiming for smooth sides and top. A bench scraper really helps get those clean edges.
- Make The Nest Look:
- Softly push chocolate shavings around the top edge to create a nest shape. Carefully place candy eggs in the middle of your nest. For realistic robin's egg spots, mix a bit of cocoa with water and flick it onto the frosting using a clean paintbrush.
Anyone who tastes this cake wants to know the trick behind its deep chocolate flavor. Using hot water to bloom the cocoa and swapping in buttermilk instead of regular milk creates such rich taste that boxed cakes just can't match up. My grandma showed me this trick when I first started baking as a kid.
Make-Ahead Options
What's great about this fancy cake is how it fits into busy plans. You can bake the chocolate layers up to three days early and keep them wrapped tight in plastic at room temperature. You can even freeze the bare layers for up to a month. Just let them thaw in the fridge overnight before you put everything together. The frosting works fine made a day ahead and kept cold. Just bring it to room temp and give it a quick mix before using it.
Variations To Try
While the robin's egg look works perfectly for spring parties, this awesome chocolate cake fits any time of year with different decorating ideas. For birthday parties, go with any color frosting you like and top with sprinkles instead of the nest. During Christmas or winter, try mint frosting with chocolate ganache dripping down for a fancy treat. For total chocolate lovers, skip the blue color and just do chocolate frosting with a chocolate nest. The moist cake goes well with pretty much any frosting flavor you can think up.
Serving Suggestions
This pretty cake tastes best when served at room temperature. It goes really well with a scoop of vanilla ice cream or some fresh berries on the side. For something extra nice, make a raspberry sauce to drizzle on each plate before adding the cake slice. When you're having a spring brunch, try putting some fresh edible flowers around the cake plate to really bring out that garden feel.
Frequently Asked Questions
- → How do I keep the cake soft?
Adding buttermilk to the batter helps lock in moisture. Also, keep an eye on it while baking and check with a toothpick for perfect doneness.
- → What’s the easiest way to make blue frosting?
Go with gel food coloring, and add just a bit at a time to avoid going too dark.
- → How can I create speckles on the frosting?
Dip a small brush in thin cocoa powder or gel food coloring, then flick it lightly over the frosted surface.
- → Can I prepare the cake ahead of time?
Absolutely! Bake the layers the day before, store them in the freezer, and frost them when you’re ready to serve.
- → What can I use instead of the candy eggs?
Swap them with truffles, candy-coated nuts, or colorful sugar candies.
- → Any tips for smooth frosting?
Keep the cake layers cold and use a spatula or scraper to evenly spread the frosting.