
 Pin it
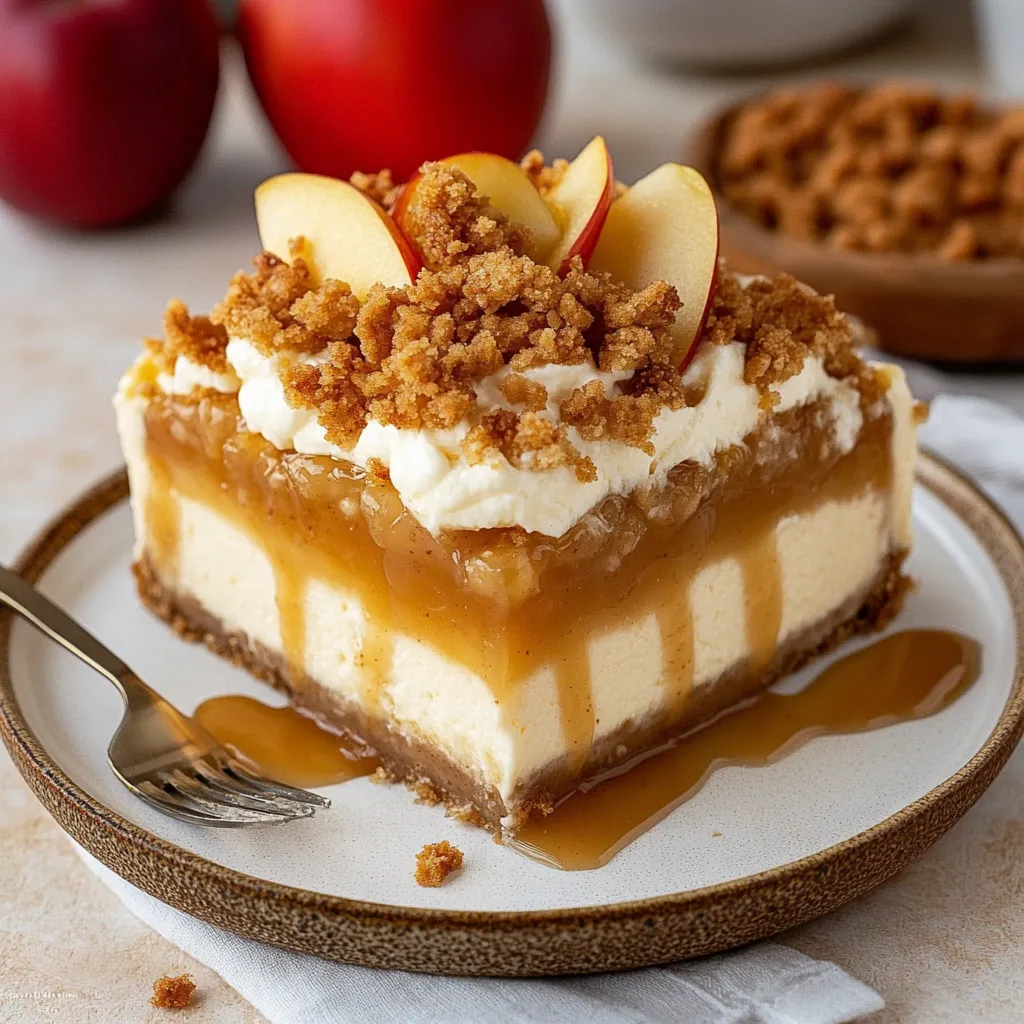
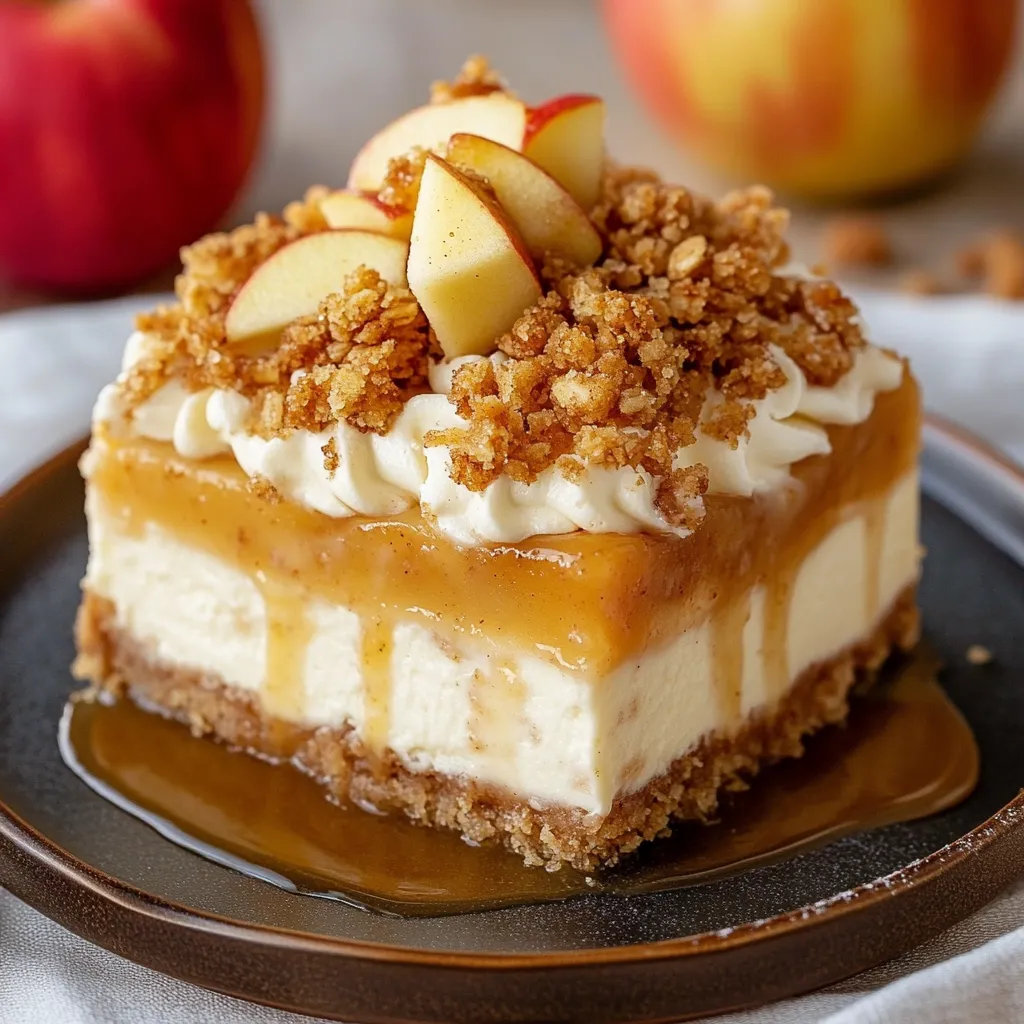
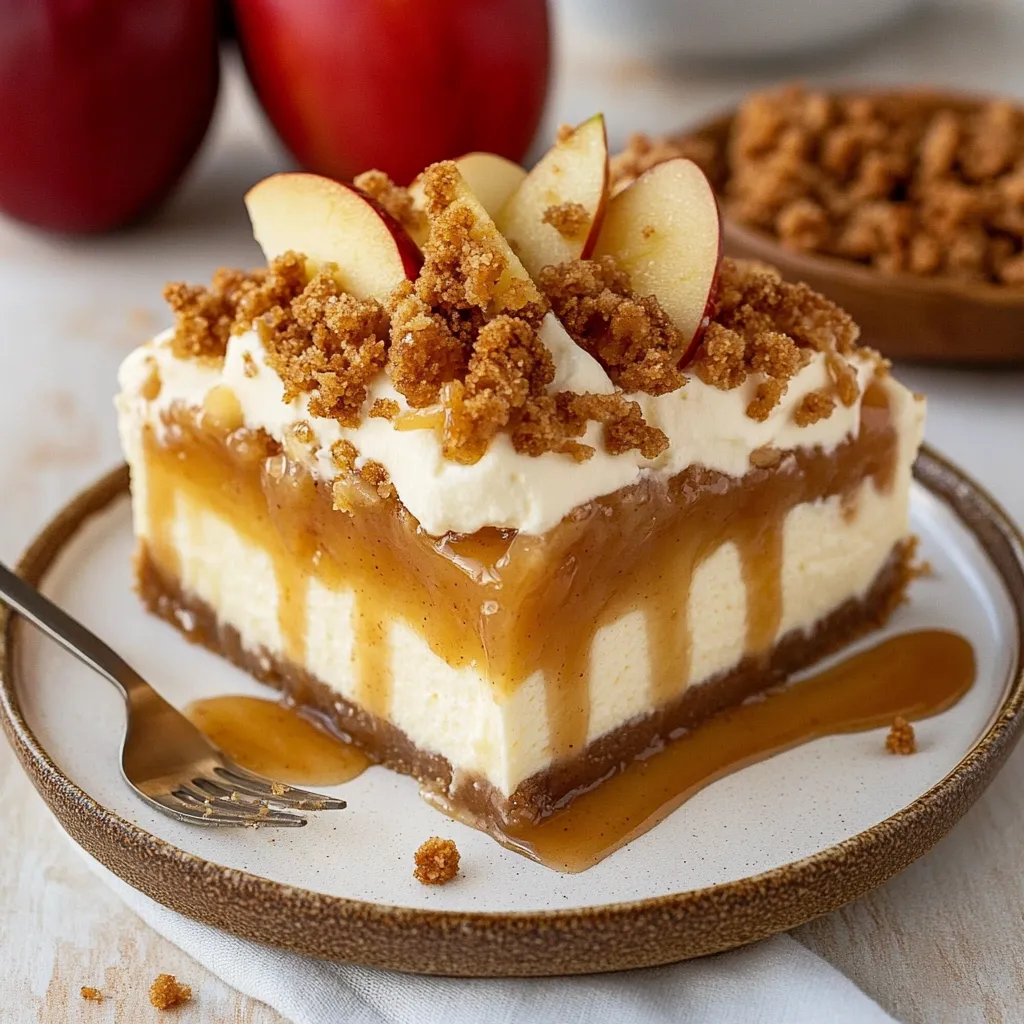
You get all the best fall flavors in this gorgeous Apple Crisp Cheesecake. It's got a cozy graham cracker base, thick cheesecake in the center, and gets loaded up with soft spiced apples and a crumbly oat topping.
I whipped this up once at Thanksgiving because I was torn between pie, crisp, and cheesecake. My family begged for it again, so now we have to make it at every fall gathering, especially for birthdays. It’s our new must-have.
Incredible Ingredients
- Cinnamon: pumps that spice into every bite, especially if you grab Saigon for extra aroma
- Quick oats: throw these into the topping for classic crumbly texture, or swap for old-fashioned ones if you like a bit more chew
- Gala apples: use these firm guys so the chunks stay together and add natural sweetness—make sure they’re not bruised up
- Cream cheese: let it get really soft at room temp (I love Philadelphia for the smoothest middle)
- Brown sugar: gives yummy caramel notes that just work great with apples
- Cinnamon graham cracker crumbs: gives your crust a sweet-spicy base that matches the whole dessert
Simple Instructions
- Bake and Build:
- Bake the cheesecake sitting just above the hot water tray. Give it 50–55 minutes; you want the middle to be just a tad wobbly when you give the pan a shake.
- Put on the Crisp Topping:
- Rub together flour, oats, cinnamon, brown sugar, and butter with your fingers. You’re aiming for a mix of big and mini crumbles—makes those bites extra nice.
- Layer the Apples:
- Peel and chop apples, then coat with a blend of cinnamon and brown sugar. Let them rest for 5 minutes so the juices start coming out and kick up the flavor.
- Mix the Cheesecake Base:
- Beat together your cream cheese and brown sugar for a good three minutes—get every bump out. Mix in flour, cinnamon, and vanilla, then beat in eggs one at a time, just until everything's blended in. Don’t overdo it or you’ll get cracks!
- Crust It:
- Stir crumbs, sugar, and melted butter until they look like wet sand. Press all that into your springform pan so it’s nice and firm. Grab the back of a measuring cup to flatten it out.
- Sort Your Pan and Water:
- Heat your oven to 350°F, then put a half-filled pan of water on the bottom rack for steam. Line your cheesecake pan with parchment after that—makes getting it out a breeze.
 Pin it
Cinnamon is the real magic in this dish. My grandma always tossed it into the cheesecake center instead of just the apples, and it totally takes everything up a notch. Once the smell hits the kitchen, we all know fall's here!
Handy Make-Ahead Ideas
You can put this together up to three days before eating—just chill it in the pan in the fridge. The flavors keep getting better as it hangs out! Wait on the caramel drizzle ’til you’re serving so the topping stays crisp.
Fun Ways to Serve
Pour over some warm caramel and your friends will be blown away. Let slices lose their chill for the best taste. And pop a little whipped cream on the side to balance those rich, sweet layers.
Cool Seasonal Swaps
Gala apples always get good results, but it’s fun to play around. Want something a little tarter? Use Granny Smith. After extra juicy? Honeycrisp is for you. Try mixing different kinds if it’s big apple season. Add a spoon of apple butter to your cheesecake filling for an extra apple kick.
 Pin it
Frequently Asked Questions
- → Can I swap out the apple variety in this dessert?
Definitely! Gala apples are ideal for their sweetness and texture, but you can also try Honeycrisp, Pink Lady, or Braeburn. Just avoid softer kinds like McIntosh, which might get too soft while baking.
- → Why should this cheesecake be baked in water?
A water bath adds moisture inside the oven, helping the cheesecake cook evenly. It also keeps the top from cracking and gives it a smooth, creamy texture. The water prevents the heat from cooking it too quickly or drying it out.
- → Can I prep this dessert early?
Sure! This dessert gets even better with time. Let it chill for at least 6 hours, though overnight is best. It’ll stay good for up to 3 days in the fridge. Add caramel or whipped toppings just before serving.
- → Is there a gluten-free way to make this treat?
Yes! Just switch out the graham crackers with gluten-free ones, use certified gluten-free oats for the topping, and opt for a 1:1 gluten-free flour blend instead of regular flour everywhere in the recipe.
- → How can I slice it without making a mess?
Use a sharp knife dipped in hot water and dry it off before each slice. This method keeps the knife clean, cuts through smoothly, and prevents the crust and topping from falling apart.
- → How do I know it’s baked just right?
The sides should be firm, but the center should jiggle a little (about 2-3 inches of wobble). It’ll firm up as it cools. Leave it slightly undercooked rather than overdone so it stays creamy and soft.