
 Pin it
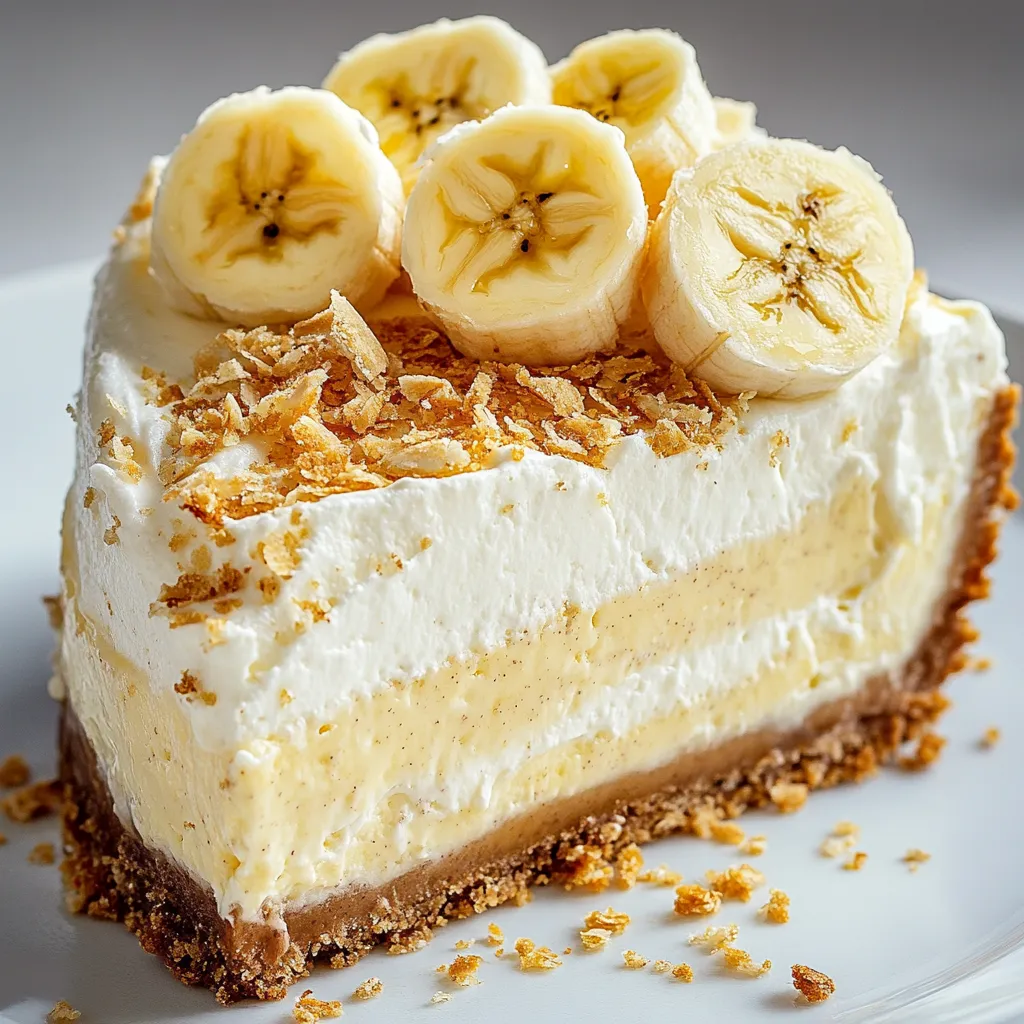
When two dessert classics collide, you get this mind-blowing Banana Pudding Cheesecake. Velvety smooth cheesecake layers mix with all the warm, comforting tastes of traditional banana pudding. It's a treat that feels like home but tastes like heaven. Just wait till you cut into those gorgeous layers - a crunchy vanilla wafer base, banana-packed filling, and that dreamy, cloud-soft topping come together for a dessert moment you won't forget.
I made this for my mom's birthday celebration a few weeks back, and she honestly said it beat the banana pudding she's been whipping up for four decades. The trick? Grab those perfectly ripe bananas and don't rush the chilling time - the fridge works magic as those flavors mingle overnight.
Key Components and Smart Shopping Advice
- Cream Cheese: Stick with the full-fat blocks only, not the light or whipped stuff. You need that richness for the right texture.
- Bananas: Go for yellow ones with brown freckles - they pack the most banana punch without making things soggy.
- Nilla Wafers: The real deal works best here. I've found generic brands often fall apart too easily.
- Sour Cream: Get the full-fat kind and let it sit out before using for the smoothest mixing.
- Heavy Cream: Pick up the carton labeled 'heavy whipping cream' with at least 36% fat for that luxurious mouthfeel.
Step-by-Step Baking Guide
- Step 1: Starting With The Base
- Set your oven to 325°F exactly. Blitz those Nilla Wafers in your food processor until they look like sand. Mix them with melted butter and brown sugar. Pack this mixture down firmly using a measuring cup with a flat bottom. Pop it in the oven for 11 minutes.
- Step 2: Cooling Period
- Let your crust cool down. While waiting, grab all your filling ingredients and make sure they've warmed to room temperature.
- Step 3: Creating The Filling
- Whip that cream cheese until it's super smooth. Add sugar, making sure to scrape down the bowl often. Smash your bananas into a smooth paste, then mix them in with vanilla, sour cream, and heavy cream. Add your eggs one at a time, keeping the mixer speed low.
- Step 4: Building It Up
- Pour half your batter over the cooled crust. Add a layer of thin banana slices and sprinkle some crushed wafers. Top with the rest of your batter and smooth it out.
- Step 5: Getting Ready For The Oven
- Wrap your springform pan carefully, put it in a bigger pan, then place both inside a roasting pan. Pour hot water around them until it reaches halfway up.
- Step 6: Baking And Cooling Time
- Bake for 80-90 minutes until the edges look set but the middle still wobbles a bit. Turn the oven off but leave the door cracked open to let it cool down slowly.
 Pin it
Understanding Your Cheesecake Chemistry
Knowing how everything works together gives you that dream texture. The proteins in your cream cheese and eggs firm up as they heat, while all that fat from your cream and sour cream brings the richness. The bananas add moisture and sweetness, but you need just the right amount or things get too wet.
Getting Temperatures Just Right
Watch those temperatures carefully. Your ingredients need to be room temp so they mix without lumps. I learned this lesson the hard way when I rushed to make this for friends coming over. Cold ingredients left me with a bumpy batter!
 Pin it
This Banana Pudding Cheesecake has become my go-to wow dessert. It's got that perfect mix of creamy cheesecake luxury and the comforting banana pudding flavor we all grew up loving. Whenever I bring it to the table, people can't stop talking about it - and asking for seconds!
Frequently Asked Questions
- → What’s the purpose of a water bath?
- It helps bake evenly with moist heat, avoiding cracks and giving a silky texture.
- → Why use room temperature ingredients?
- Mixing is smoother, avoiding lumps, and it makes the cheesecake texture perfect.
- → Can this dessert be made early?
- Absolutely! Chill for 6 hours or prep up to 2 days before serving.
- → Why add a banana layer in the center?
- It boosts the banana pudding flavor and adds a great texture to each slice.
- → How do I keep the water bath from leaking?
- Wrap the pan in foil or use a separate cake pan for extra protection.