
 Pin it
Trying to make gluten-free dinner rolls that actually tasted good was really tough after my family found out we had celiac. No matter what we did, every batch was heavy, crumbly, or just didn’t compare to the ones we used to eat. The turning point was when I went to a baking workshop led by Rachel, who used to run Gluten Free Mama. That’s when everything changed for us.
Rachel’s old formula (it’s off the Internet now) totally turned things around. She let me play around with it, and now these rolls are always on our table. We pull them out for every holiday meal and a bunch of regular dinners too. Trust me, nobody in my house thinks these are a downgrade—they’re the best part of any meal.
Honest Experience and Realization
Before stumbling on this formula, making gluten-free rolls usually meant lots of letdowns. Every attempt felt like we were eating something closer to packing foam than soft bread. Rachel’s techniques flipped that. Her mix of different gluten-free flours and just the right other stuff made rolls that fooled everyone—they’re basically just like the real thing, even though there’s no gluten.Why This Adapted Method Matters
Today I’m showing you my twist on Rachel’s classic. I kept it straightforward so anyone can pull off these awesome rolls. They’re way more than just something to go with dinner. They’re real comfort food. These are soft like a cloud, taste buttery-steamy, and honestly make any meal feel extra special.Where The Idea Came From
Rachel’s careful, detailed way of baking without gluten inspired this whole thing. She built her method to copy everything people love about homemade dinner rolls. It works so well because she picked the best ingredients and stuck to exactly the right steps—from start to finish.What You’ll Need
- Gluten-Free Flour Mix - 2¾ cups (11½ oz.) of a good gluten-free blend. Try brands with xanthan gum, like Authentic Foods Multi-Blend Flour or the Almond-based mix from Gluten-Free Mama.
- Xanthan Gum - 1.5 teaspoons. Don’t use this if your flour mix already has xanthan gum listed.
- Yeast - 2 teaspoons of instant yeast, like SAF brand.
- Sugar - 1/4 cup.
- Salt - 1 teaspoon.
- Warm Water - 1 cup, about 105-110°F.
- Butter or Margarine - 2 tablespoons, either real butter, any dairy-free spread, or even Spectrum organic shortening works.
- Egg - 1, ideally not cold.
- Apple Cider Vinegar - 1 teaspoon.
Mixing Up Your Dough
- Step 2:
- Kick off the mixer on low and start adding in warm water, your melted butter or margarine, the egg, and the vinegar, little by little. Once everything’s in, speed it up to medium for around 3 minutes so the dough turns really smooth and comes together nicely.
- Step 1:
- Grab a big mixing bowl and dump in all your dry stuff first: flour blend, xanthan gum, yeast, sugar, then salt. Just give those a good stir so it all looks even.
Forming Dough Balls
- Step 2:
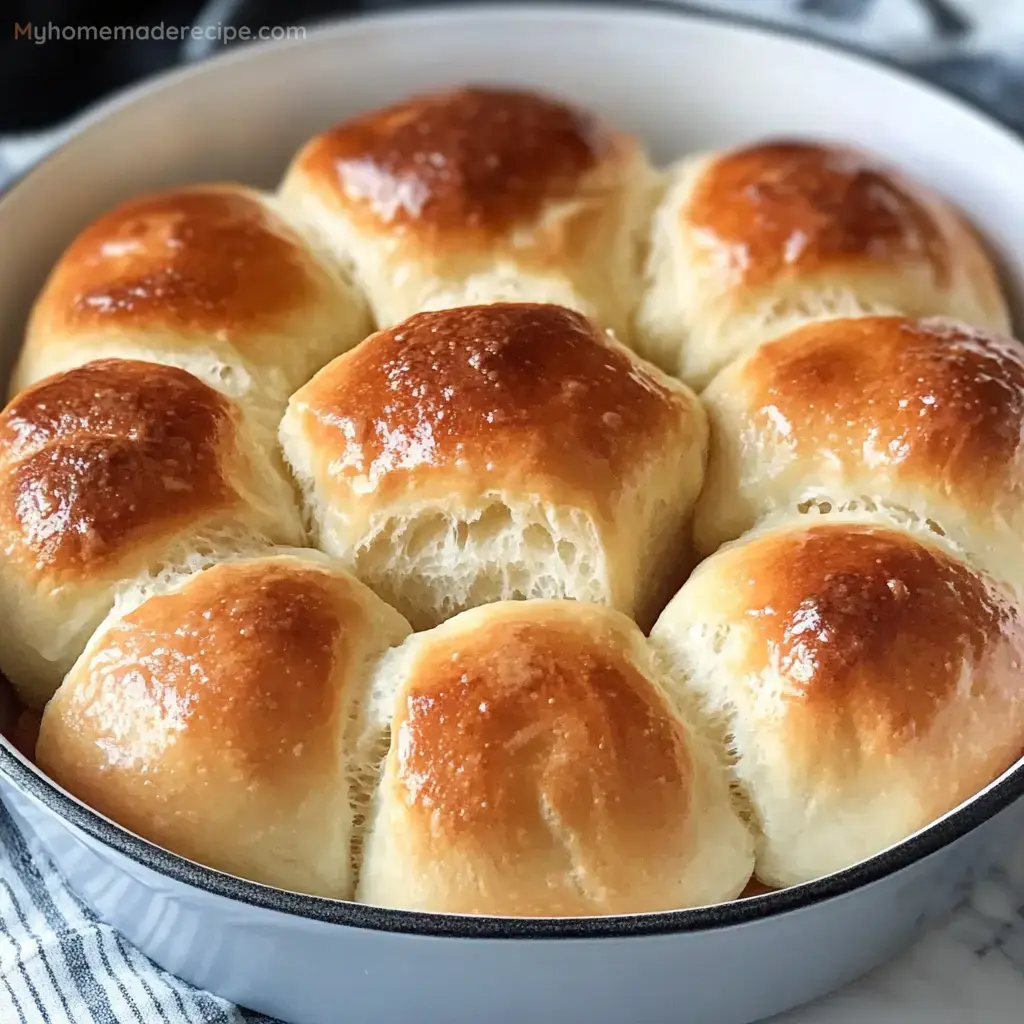
- Take a 2" cookie scoop or use a 1/3 measuring cup to plop 9 lumps of dough all around the pan—one in the middle and the rest in a ring outside it. Dunk your fingers in warm water and gently smooth out the tops. Dip your fingers again if things start to get sticky.
- Step 1:
- Take some cooking spray and coat the inside of an 8" or 9" round cake pan or a pie dish.
Letting Dough Rise
- Step 1:
- Lay a dry towel over the pan and put it somewhere warm. Let the dough chill there for 45 minutes up to an hour. This time lets the yeast do its magic so you get rolls that are light and airy, not dense.
Cooking the Rolls
- Step 2:
- When it’s time, put your pan in the middle of the hot oven. Bake the rolls for 25-28 minutes till the tops look golden and a thermometer poked in the center shows 200°F. Ovens are all a little different so peek at them near the end.
- Step 1:
- While the dough is getting its last bit of rising time, switch your oven to 400°F so it’s nice and hot when you’re ready.
Final Butter Touch
- Step 1:
- Once you pull them out of the oven, slather the rolls with a little extra melted butter (about 1/2 to 1 tablespoon). It gives them that yummy flavor and makes the tops look irresistible.