
 Pin it
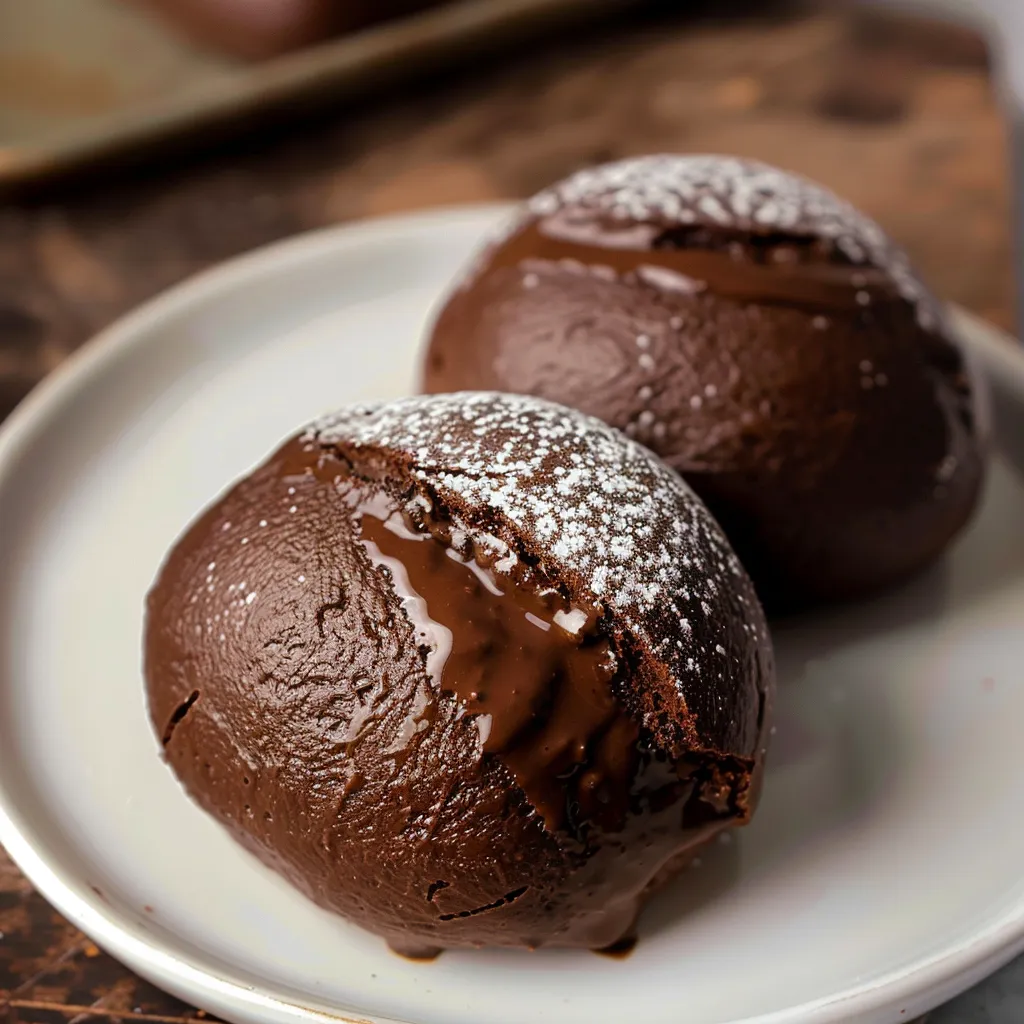
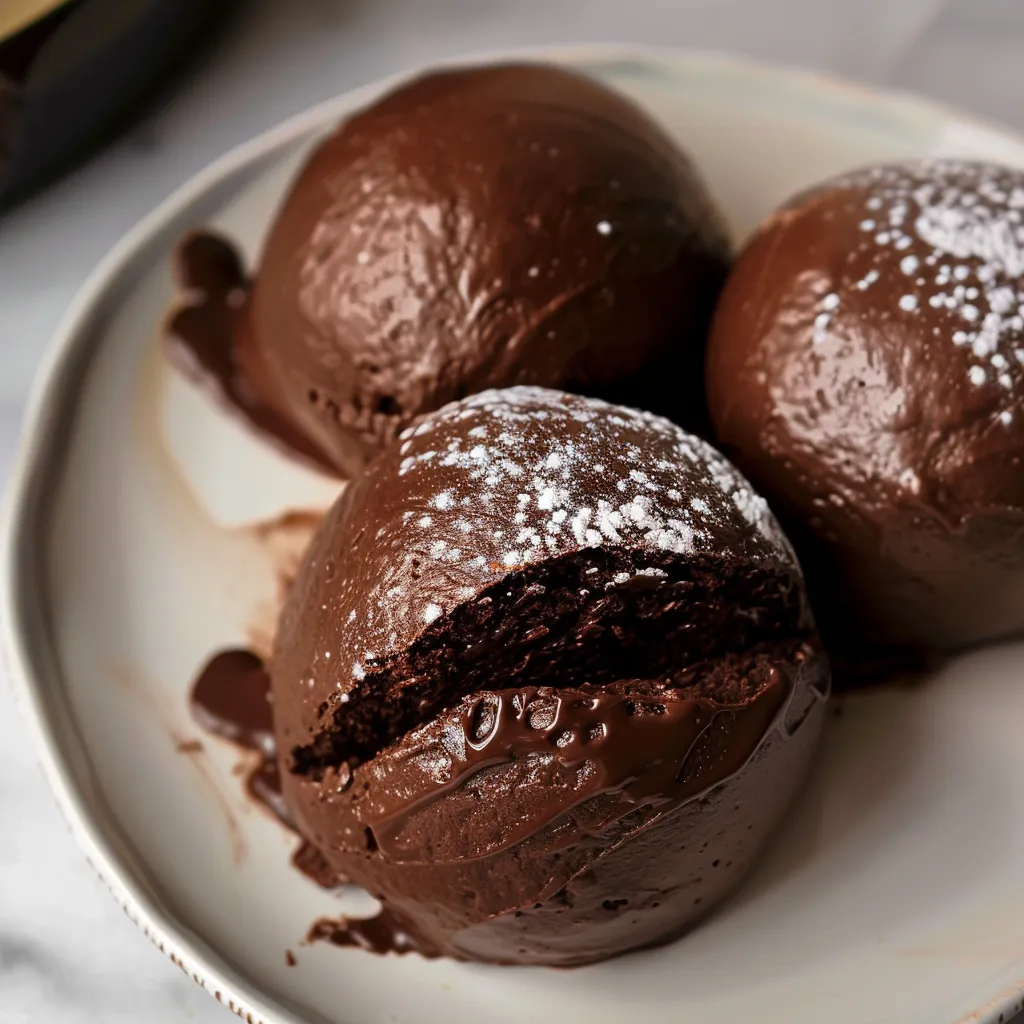
With these chocolate maritozzi, a classic Italian treat gets a rich twist. You bite into a pillowy soft roll that's paired with smooth chocolate cream—you can't stop once you start. Anyone who has a sweet tooth will flip for these.
I came across these on a trip to Italy and just had to bring them home. After that, my family started asking for them every time we did Sunday get-togethers.
Ingredients
For the dough- Cocoa powder 28g: Gives those rolls their deep chocolatey flavor and signature look.
- Neutral oil ¼ cup: Keeps the bread nice and soft inside.
- Whole or 2% milk, warm, 240g: Moistens the dough and kickstarts the yeast doing its thing.
- Large eggs, room temp, 2: Make the rolls richer and help with structure.
- Vanilla ½ tbsp: Adds that cozy aromatic note that makes chocolate taste even better.
- Salt 1 tsp: Balances all the flavors and helps the dough hold together.
- Granulated sugar 75g: Makes your buns sweet and also keeps the yeast happy.
- Instant yeast 2½ tsp: Gets the dough rising quickly and evenly every time.
- Bread flour 240g: Makes for stretchy, soft-textured rolls.
- All-purpose flour 250g: Brings structure but keeps the rolls tender.
- 1 large egg: Makes those buns nice and shiny on top.
- 1 tbsp milk: Helps spread the egg smoothly and evenly.
- 2 cups cold whipping cream: Chill it so it'll whip up perfectly.
- ⅔ cup sifted powdered sugar: Sweetens the filling and dissolves without lumps.
- 4 tbsp sifted cocoa powder: That chocolate kick in the cream makes these so good.
- Pinch of salt: Makes the chocolate flavor pop and saves it from becoming too sweet.
Step-by-Step Directions
- Finishing the Assembly:
- When the rolls are totally cool, slice each one almost all the way through, but not quite—you want them to open up like a hinge, not split apart (think hot-dog bun style). Stuff them full with chocolate whipped cream. I like using a piping bag for this but a spoon works fine. Smooth the cream along the cut with a little spatula or the back of a knife until it's flush with the bun edge. Lightly dust them with a little more powdered sugar. They're the best eaten right away, so go for it!
- Whip the chocolate cream:
- While the buns are cooling, add cream, cocoa, powdered sugar, and a bit of salt to a big bowl. Whip it up until you get firm, fluffy peaks. Toss the bowl in the fridge until it's time to fill your buns.
- Let the buns cool down:
- Once baked, switch them to a cooling rack. Give them time to fully cool off before moving on.
- Bake and prep the rolls:
- Crank your oven to 180°C. In a bowl, whisk the egg and milk for your glaze. Dab the glaze over risen buns. Bake on the center rack roughly 16 minutes. Can't tell by color when they're done since they're chocolate, so tap the base—they should sound hollow if fully baked.
- Rise the dough a second time:
- Set all your dough balls on the lined baking pan. Cover them up. Let them rise for about half an hour to a full hour. They're ready when they look puffy and feel springy to touch.
- Shape and portion:
- Take the dough out, use a knife or dough cutter, and cut into 8–12 same-size pieces. If you want perfect sizes, use a scale, but don't stress if you prefer a homemade look.
- Line your baking tray:
- Put down a piece of parchment paper on the tray before you roll up the dough so it’s ready to go.
- Let the dough rise once:
- Drop the dough ball in a greased bowl. Cover. Leave it for about 1–2 hours, until it’s doubled in size. This makes your maritozzi light and airy.
- Mix up the dough:
- Chuck all the dough ingredients into a stand mixer with the dough hook on. Slow speed at first—mix it until you have a smooth dough. It should feel sticky and cling to the bottom but not the sides. This gets the texture just right because it works the gluten.
Storage Tips
Keep unfilled buns at room temp in a sealed container for two to three days. You want them fresher for longer? Toss them in the freezer for up to a month. Let them thaw completely before filling.
Once filled, stash the maritozzi in the fridge and eat within a day if you can—the cream will soften the bread if it sits too long. Honestly, I only fill the ones I know I’ll eat soon so the bread doesn’t get dry or mushy in there.
 Pin it
Twists and Swaps
Want dairy-free buns? Use soy or almond milk and swap out the cream for a plant-based kind. You’ll notice a little flavor change, but they’ll still taste awesome.
Craving something fruity? Throw in some orange zest to the dough or stir a splash of orange liqueur into your whipped cream. That citrus vibe goes great with chocolate.
If you prefer the classic style, just skip the cocoa in the dough for a traditional bun, but keep the chocolate cream for filling—win-win.
Serving Ideas
Level up brunch with these chocolate maritozzi—set them out with strong Italian coffee for the real deal.
Want to make them even fancier? Top each one off with chocolate shavings, some fresh berries, or chopped hazelnuts.
They’re also a hit with kids as an after-school snack. Pair with cold milk and watch them disappear.
Frequently Asked Questions
- → What makes brioche dough extra soft?
Use room-temperature ingredients and knead the dough until smooth and elastic. Let it rise fully at every stage for that fluffy texture.
- → Can I swap cocoa for another flavor?
Sure! Try citrus zest or spices like cinnamon to switch up the flavor while keeping the bun airy and light.
- → How do I know the buns are done?
Gently tap the bottom of a bun; it should sound hollow. Keep an eye on the color too, although cocoa may make that tricky to judge.
- → How can I stop my whipped cream from collapsing?
Make sure your cream is very cold, and beat it until you get firm peaks. Don't over-whip, or it could turn into butter.
- → Can I prepare maritozzi ahead of time?
Yes! Store the unfilled buns in an airtight container and add the cream filling just before serving to keep them fresh.
- → What can I add to the filling for a twist?
Mix in chocolate chips, fresh fruit, or a dollop of jam for extra flavor in your maritozzi.